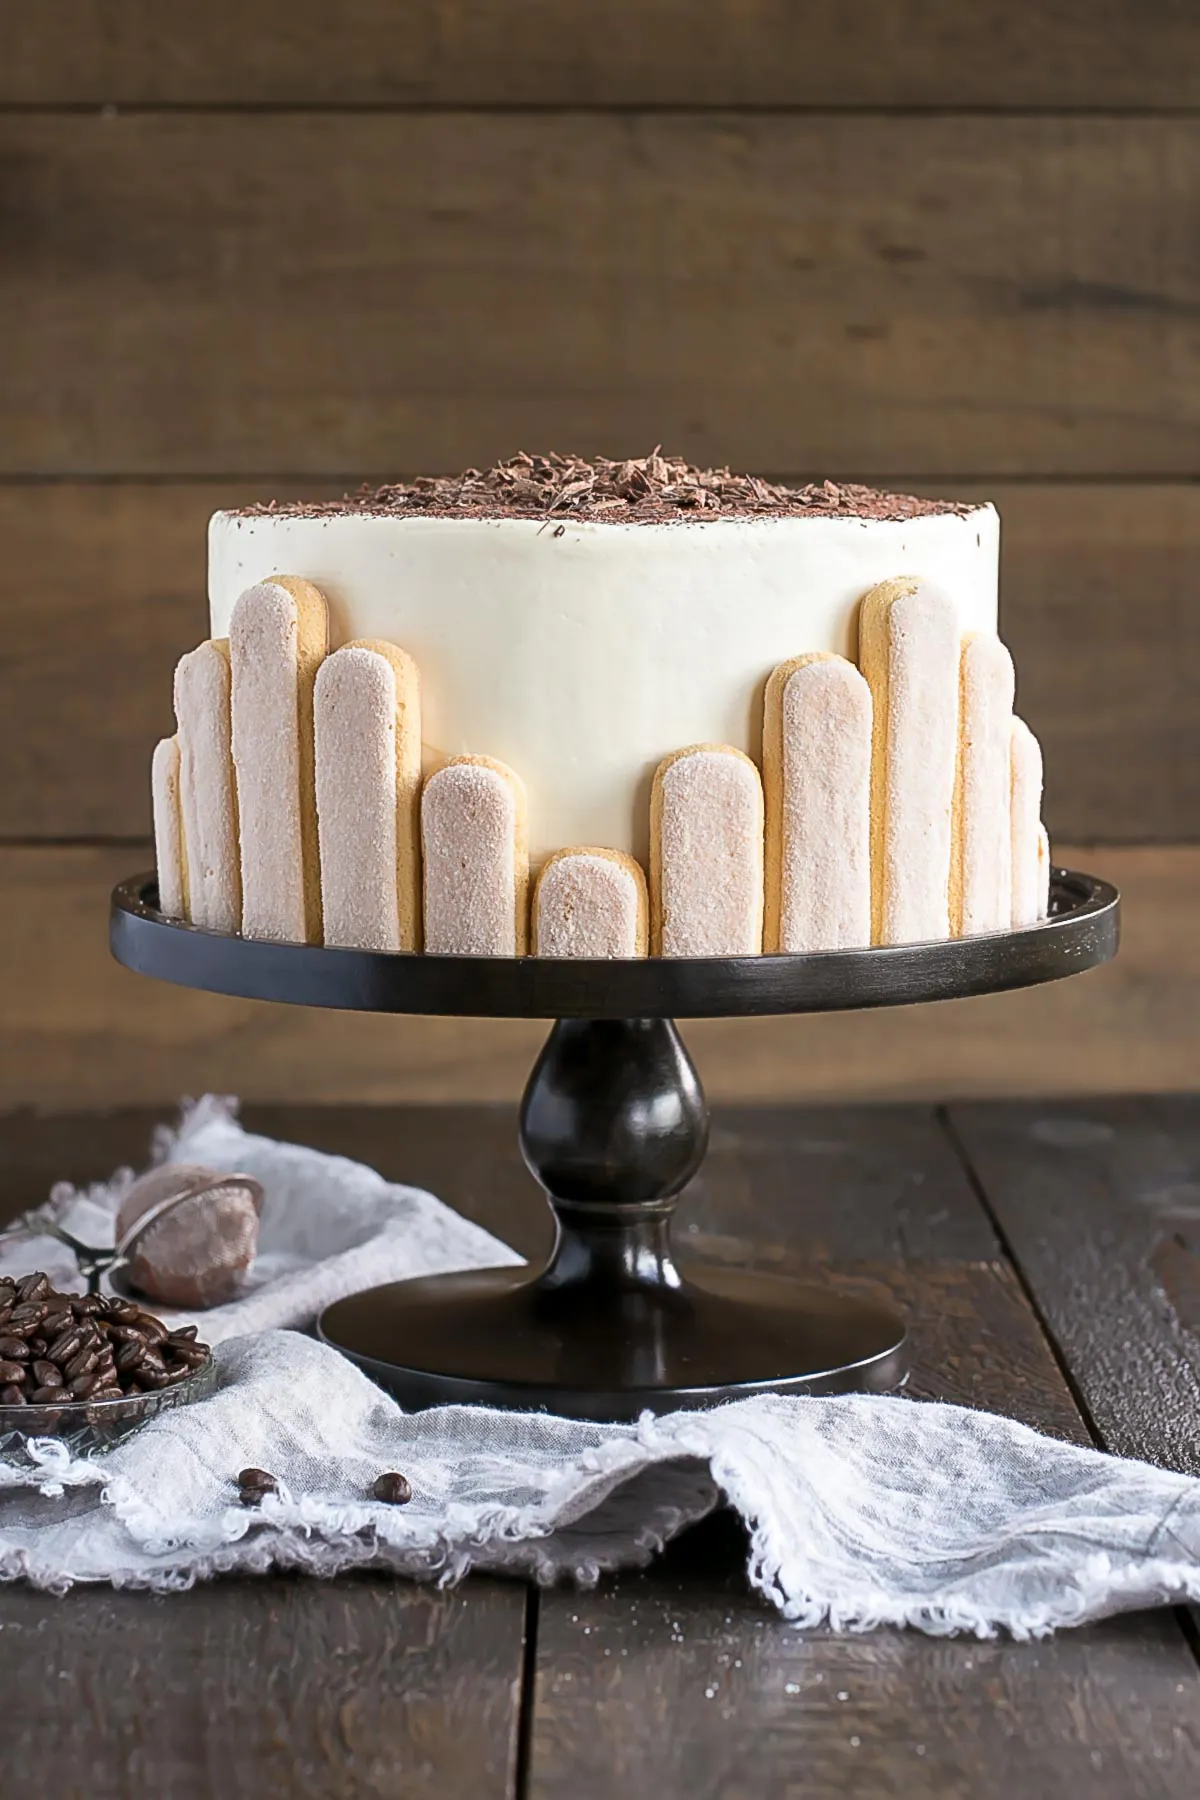
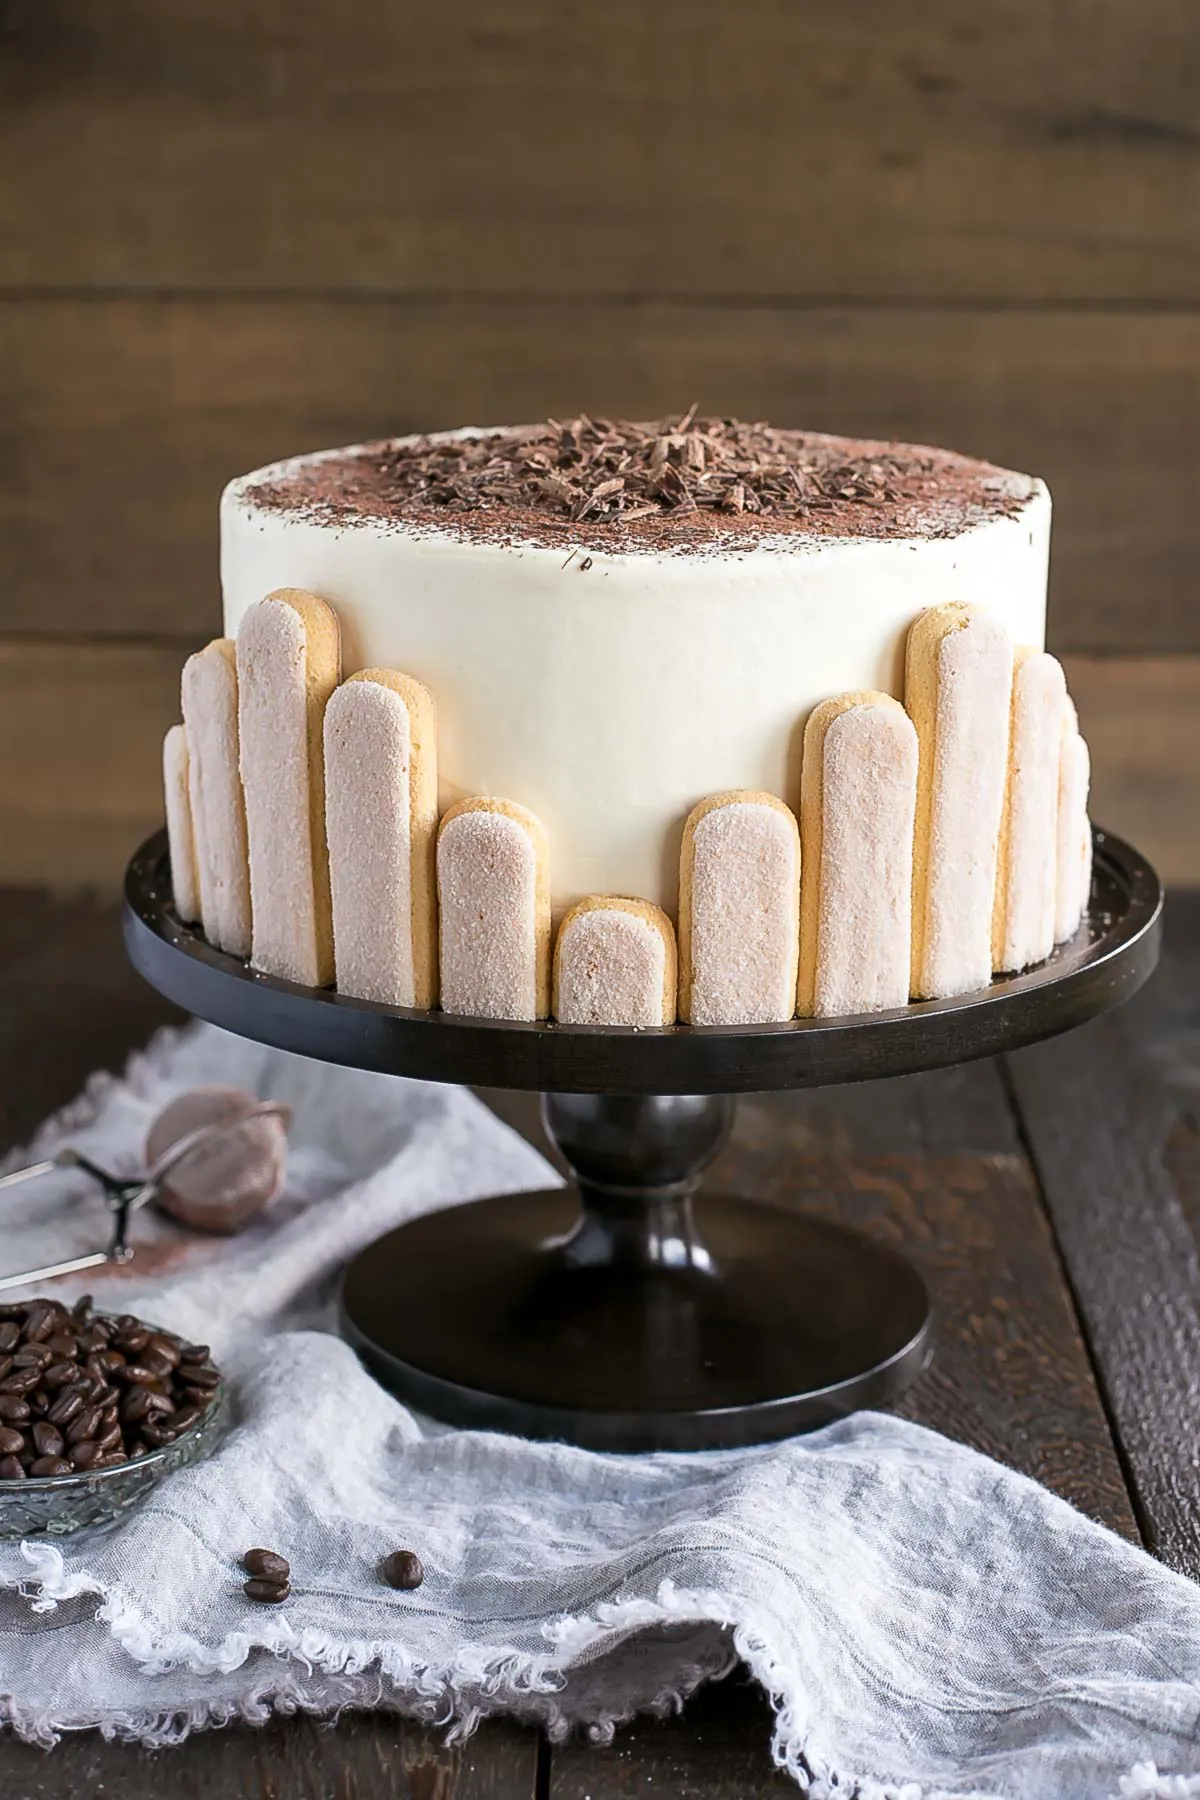
This Tiramisu Cake turns your favorite Italian dessert into a delicious and decadent layer cake. Coffee soaked layers paired with mascarpone buttercream.
This is going to be another one of those posts where you will hopefully learn something from my mistakes.
It’s no secret that I have fails in the kitchen more often than I’d like to admit. I figure most normal people do though, so why not just lay all the cards out on the table, right?
Things don’t always go how you expect. And this time, with this Tiramisu Cake, it was due to a rookie mistake on my part.
What is Tiramisu?
Tiramisu is an Italian dessert consisting of coffee-soaked lady fingers layered with a whipped mascarpone cream filling and dusted with cocoa powder. It is heaven.
To transform this delicious dessert into a layer cake I used the following:
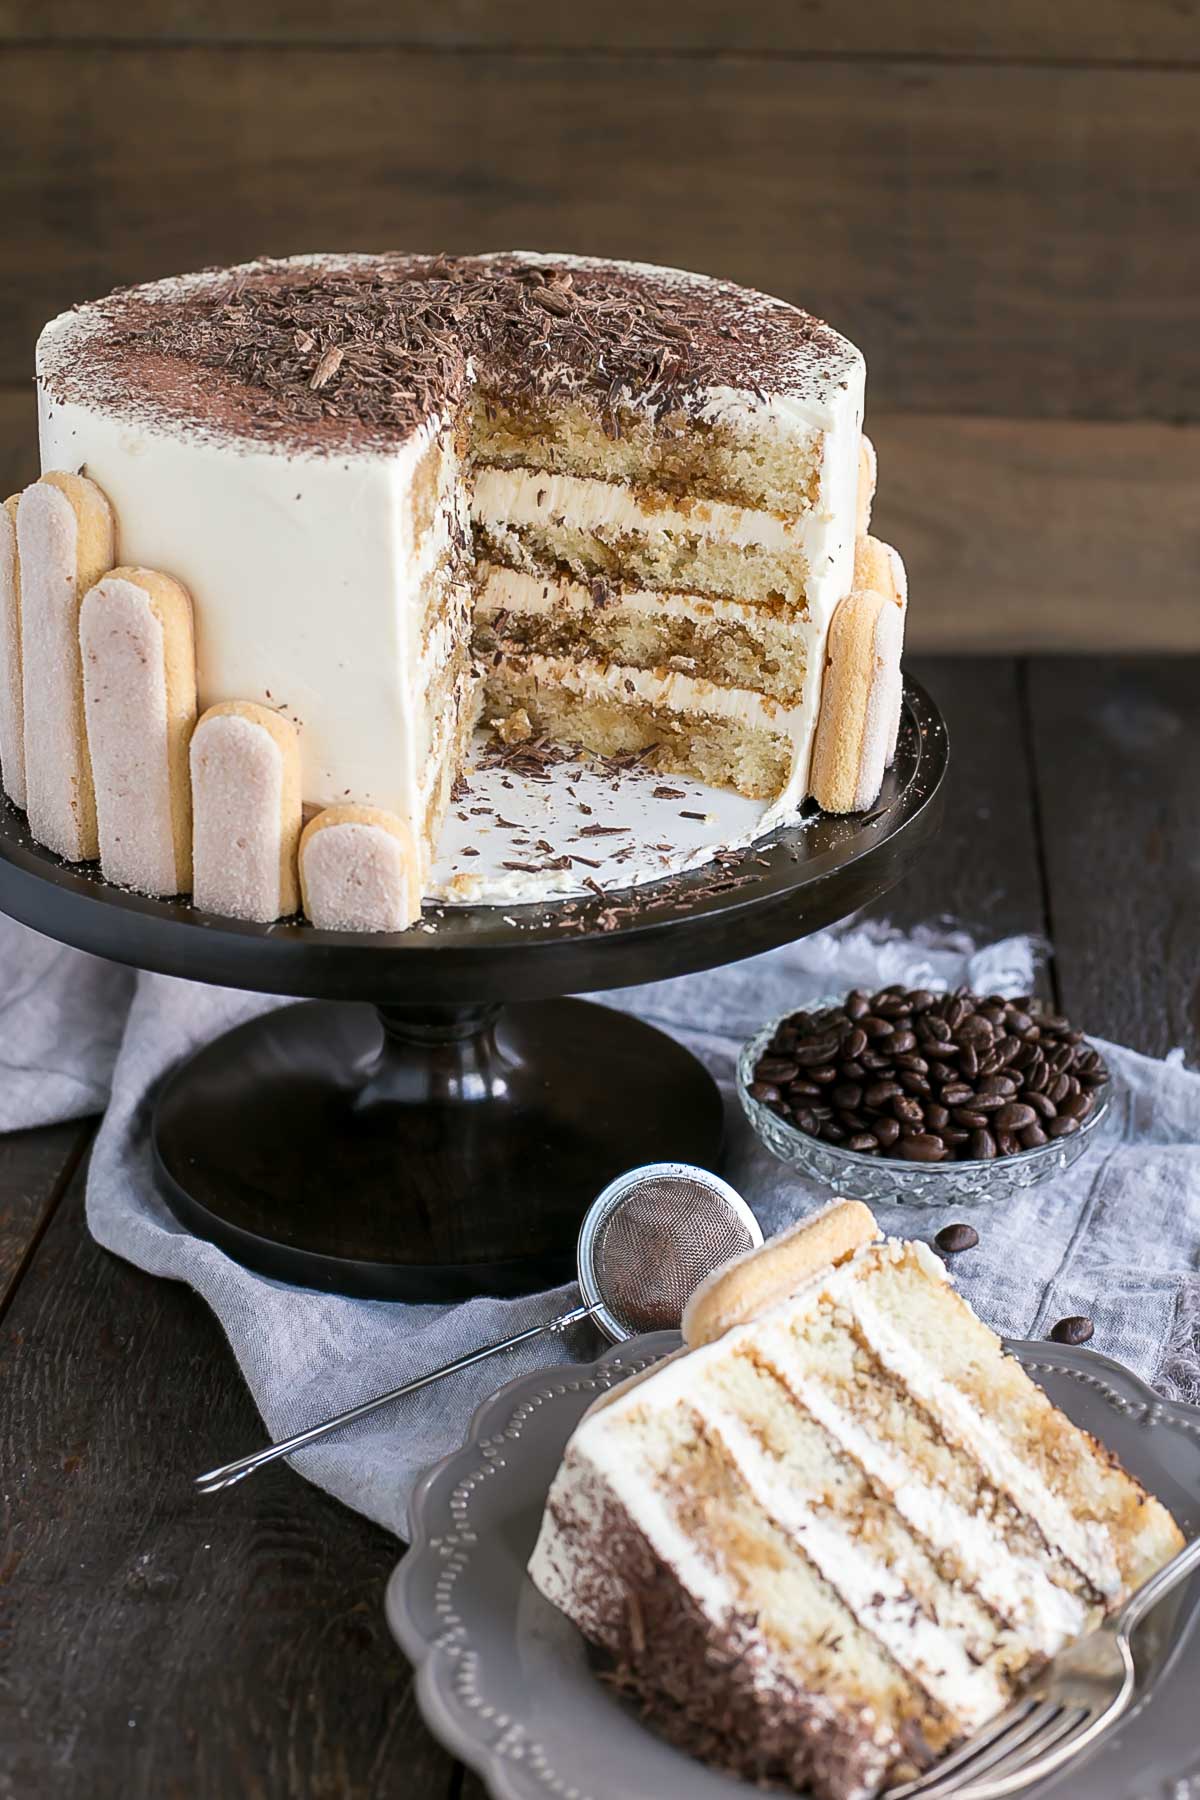
- Vanilla cake layers
- Coffee simple syrup
- Mascarpone frosting
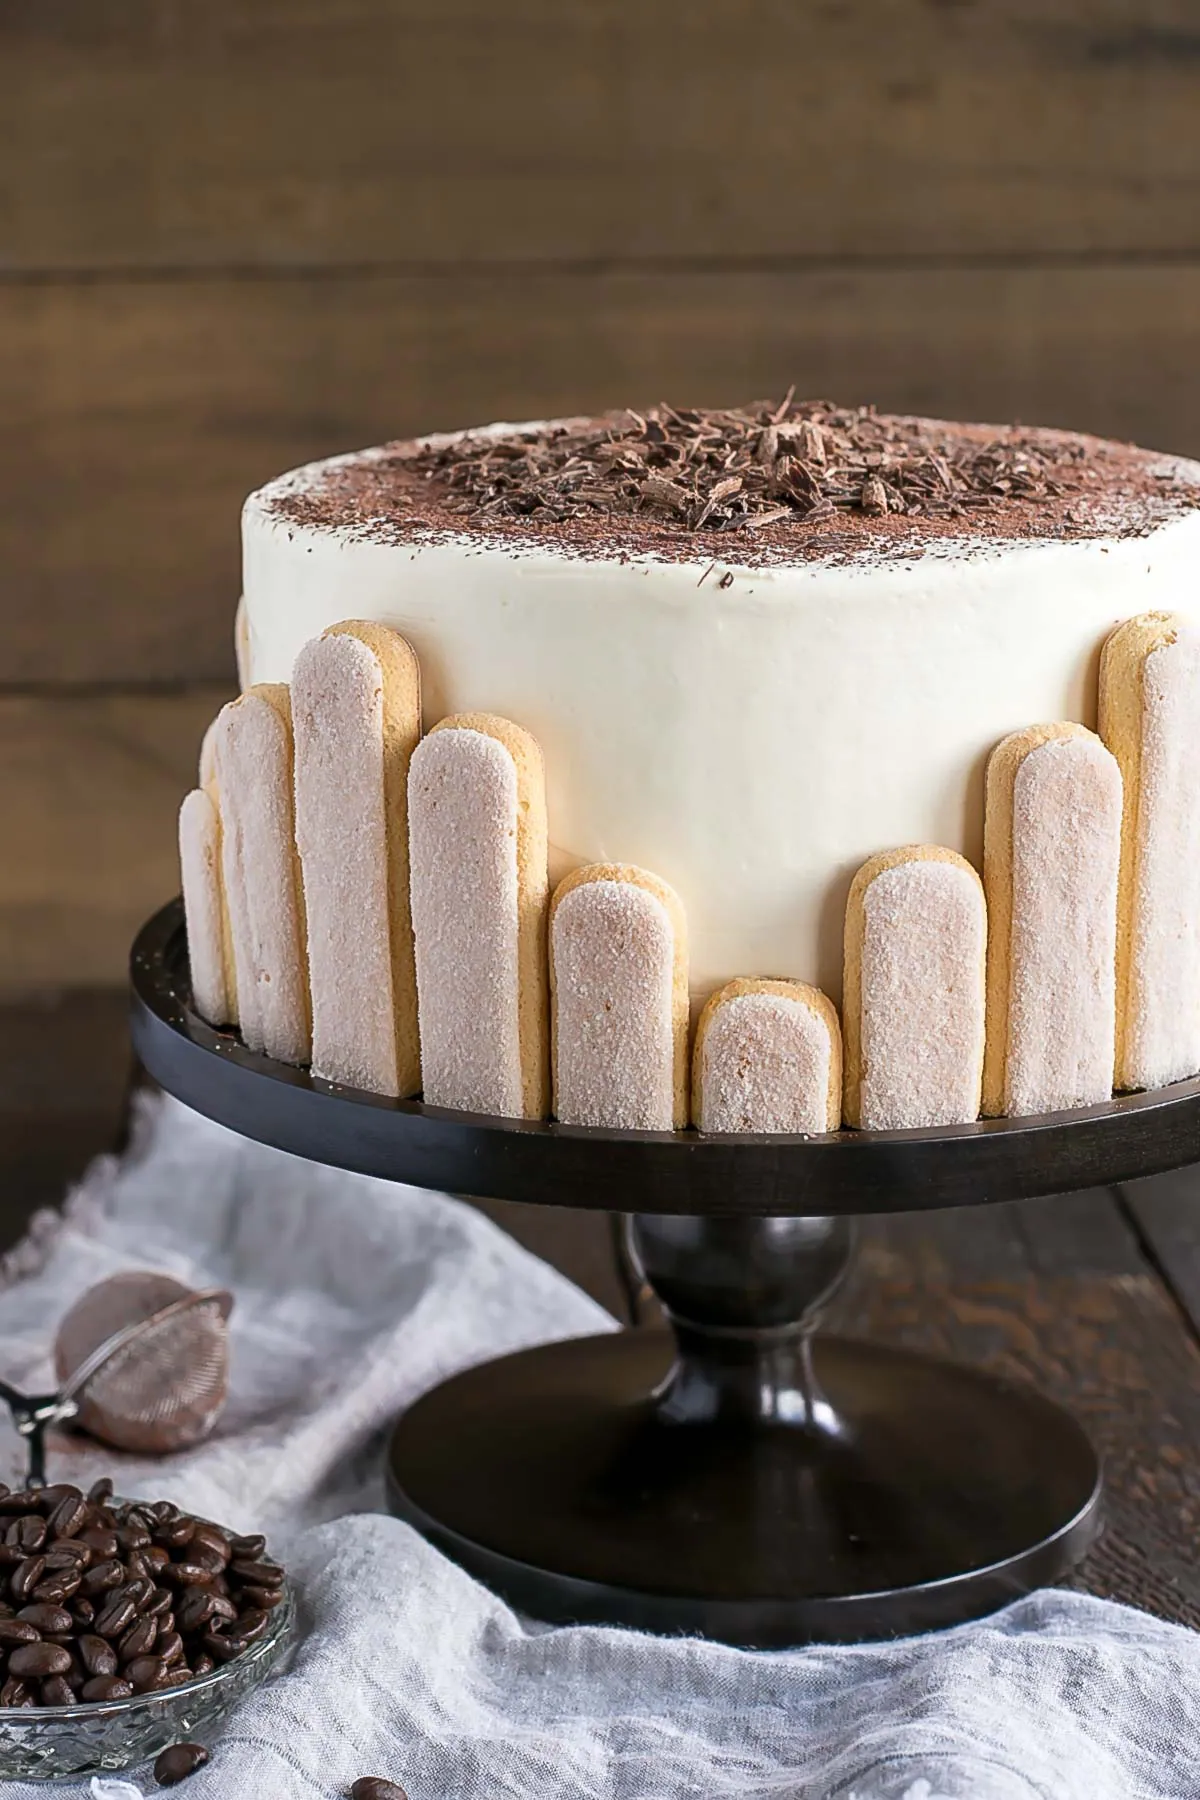
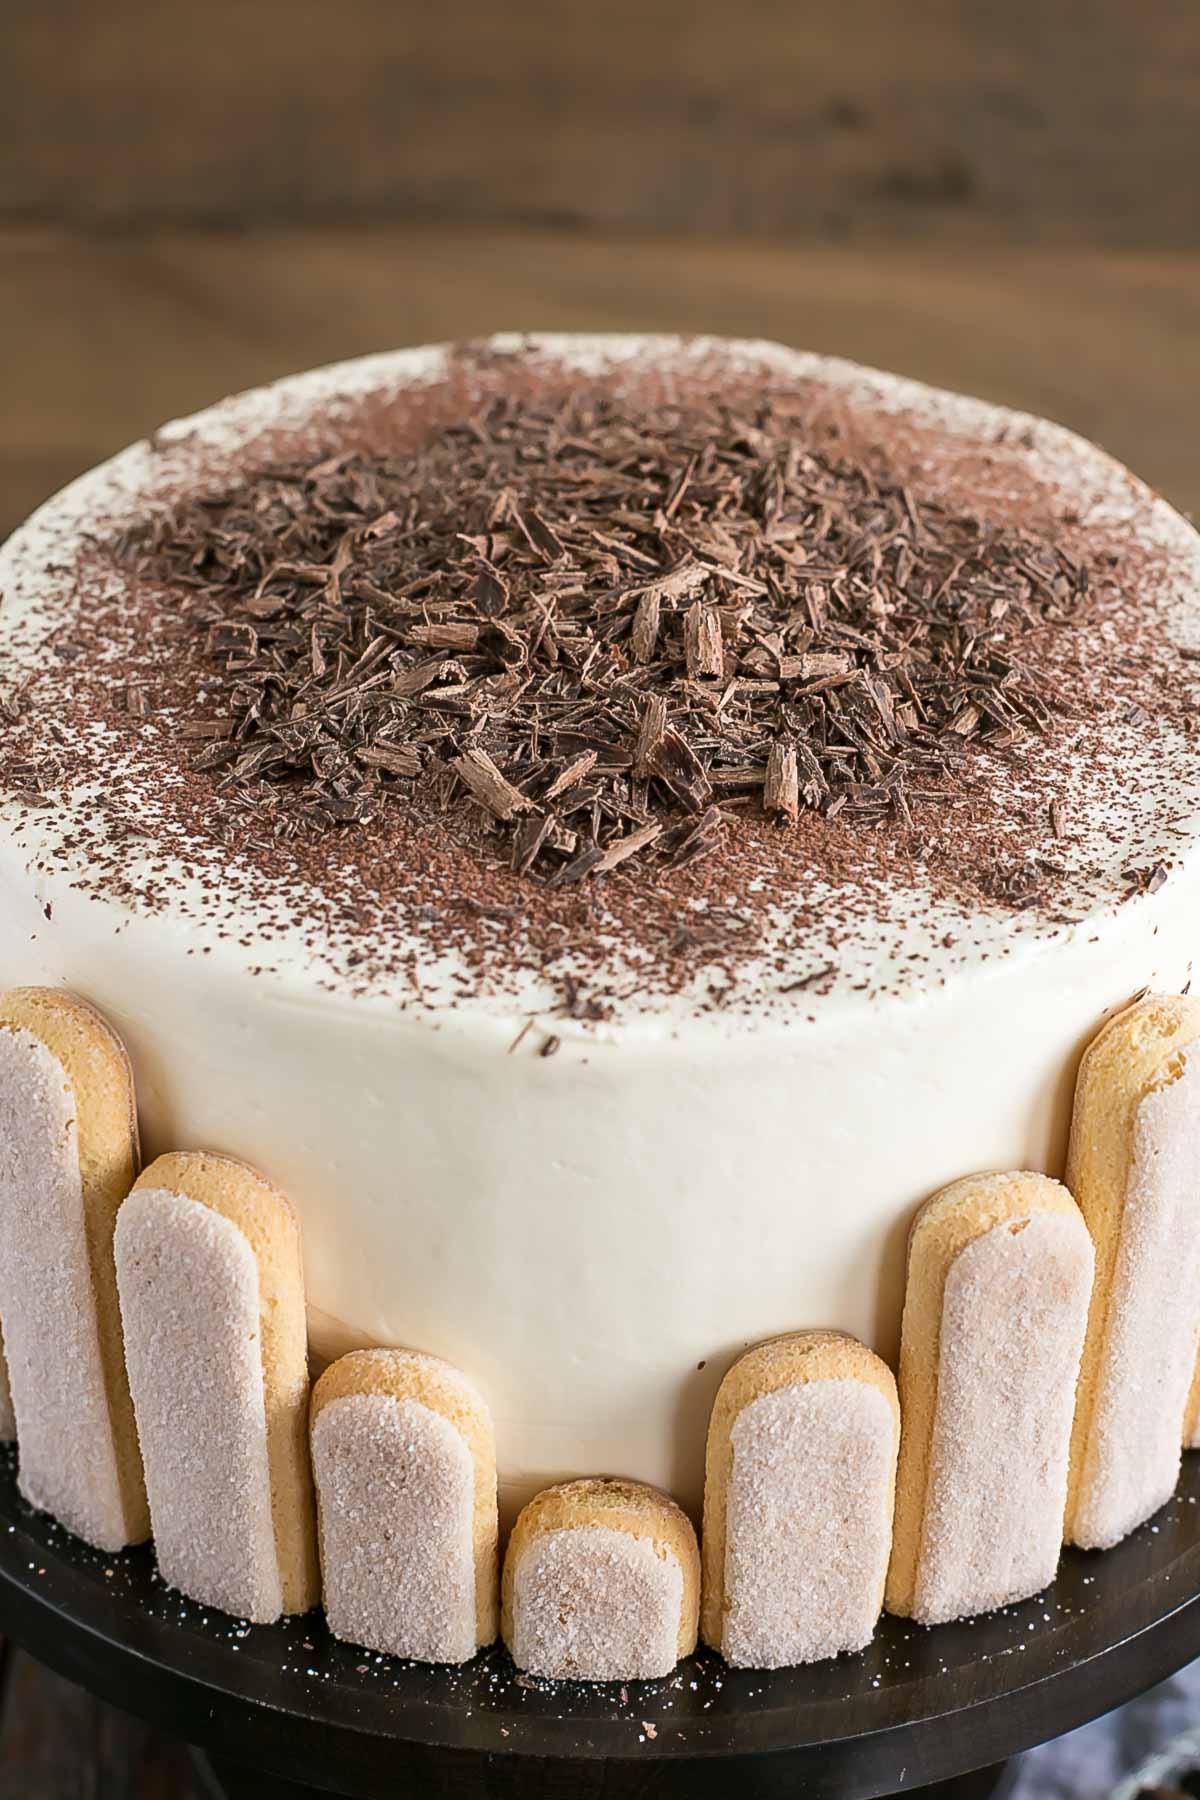
- Lady fingers
- Chocolate shavings & cocoa powder
How to Make this Tiramisu Cake
For the cake layers I used my favorite Vanilla Cake recipe. No tweaks, just straight up. I thought it would be the perfect base for this Tiramisu cake.
The coffee simple syrup is a must do. Not optional especially since soaking lady fingers in coffee is a key part of the traditional dessert! Adding the coffee syrup adds a delicious flavor and moisture to the cake. You can leave the liqueur out if you prefer though.
The mascarpone frosting is where I ran into trouble…
I am usually really good at making sure all of my ingredients are at room temperature. This is important so that all of the ingredients emulsify together and yield proper results when baking. I never mess around with this when it comes to cookie dough or cake batter, but I tend to be a bit less rigid when it comes to (some) buttercreams.
Even still, I usually check the ingredients to make sure they’re not rock hard. But I actually broke my favorite KitchenAid beater blade a couple of weeks ago because I tried to whip a large chunk of butter when it was still too hard! Sad times.
So this time, with this mascarpone buttercream, I actually cut my butter up into cubes so it would come to room temperature faster. What I failed to do though, and ultimately what caused the issues (I think), is that I didn’t properly bring the tub of mascarpone to room temperature. I didn’t even check it!
I don’t know why I didn’t check it. I guess I thought it would be fine (cream cheese usually is) or that even if it was a bit stiff, it would soften up while it was whipping. What I didn’t anticipate is that the butter and mascarpone would completely curdle and separate when whipped together.
Minor panic set in when I looked into the bowl. I thought that surely more whipping would fix it, so I added in the sugar and whipped it to oblivion. No dice. Honestly, I almost considered using it in this state (wtf Olivia?).
If we still had a grocery store close by, I would have run out and bought new ingredients, but that wasn’t really an option here. Thankfully, I came to my senses and tried a trick to see if I could save it.
How to Save Curdled Buttercream
What seems like a lifetime ago I remember dealing with a curdled/separated Swiss meringue buttercream.
I had frozen some leftover buttercream, thawed it, and started to rewhip it (which is what you should do after thawing). I guess it was still a bit too cold, because what was in my mixer looked like cottage cheese soup.
I’m not even kidding you. This mascarpone frosting didn’t look quite that bad, but it just didn’t look right (or taste right).
What I remembered from last time is that you just needed to warm the frosting up a bit so that it can emulsify properly.
So I grabbed my trusty hair dryer and started heating up the sides of the bowl while the mascarpone buttercream was whipping. The hair dryer has saved me from more than one baking disaster.
Sure enough, after heating it a bit and letting it whip some more, it came together perfectly. You can also heat the buttercream in bursts over a double boiler (whipping between heating) or microwave a small amount of the buttercream and add it back to the bowl and whip. You know, if you’d rather try something more professional, lol.
So learn from my mistakes, people. Make sure all of your ingredients are actually at room temperature, or you’ll have some ugly curdled buttercream on your hands. But if that happens, now you know how to save it now, right??
Cake Tip!
Alternatively, if you don’t want a buttercream, you could make a mascarpone cream like I have in my Strawberry Shortcake Cake. It is lighter and much less sweet but also softer and less stable. Both options will be perfectly delicious.
I’m not in love with how this Tiramisu Cake looks (shocker). I should have done something, anything, with the frosting on the sides. It’s too flat and boring. Ryan says it looks very art deco, which makes me like it a little bit more. Oh well, it’s the taste that matters and it tastes ridiculously delicious!
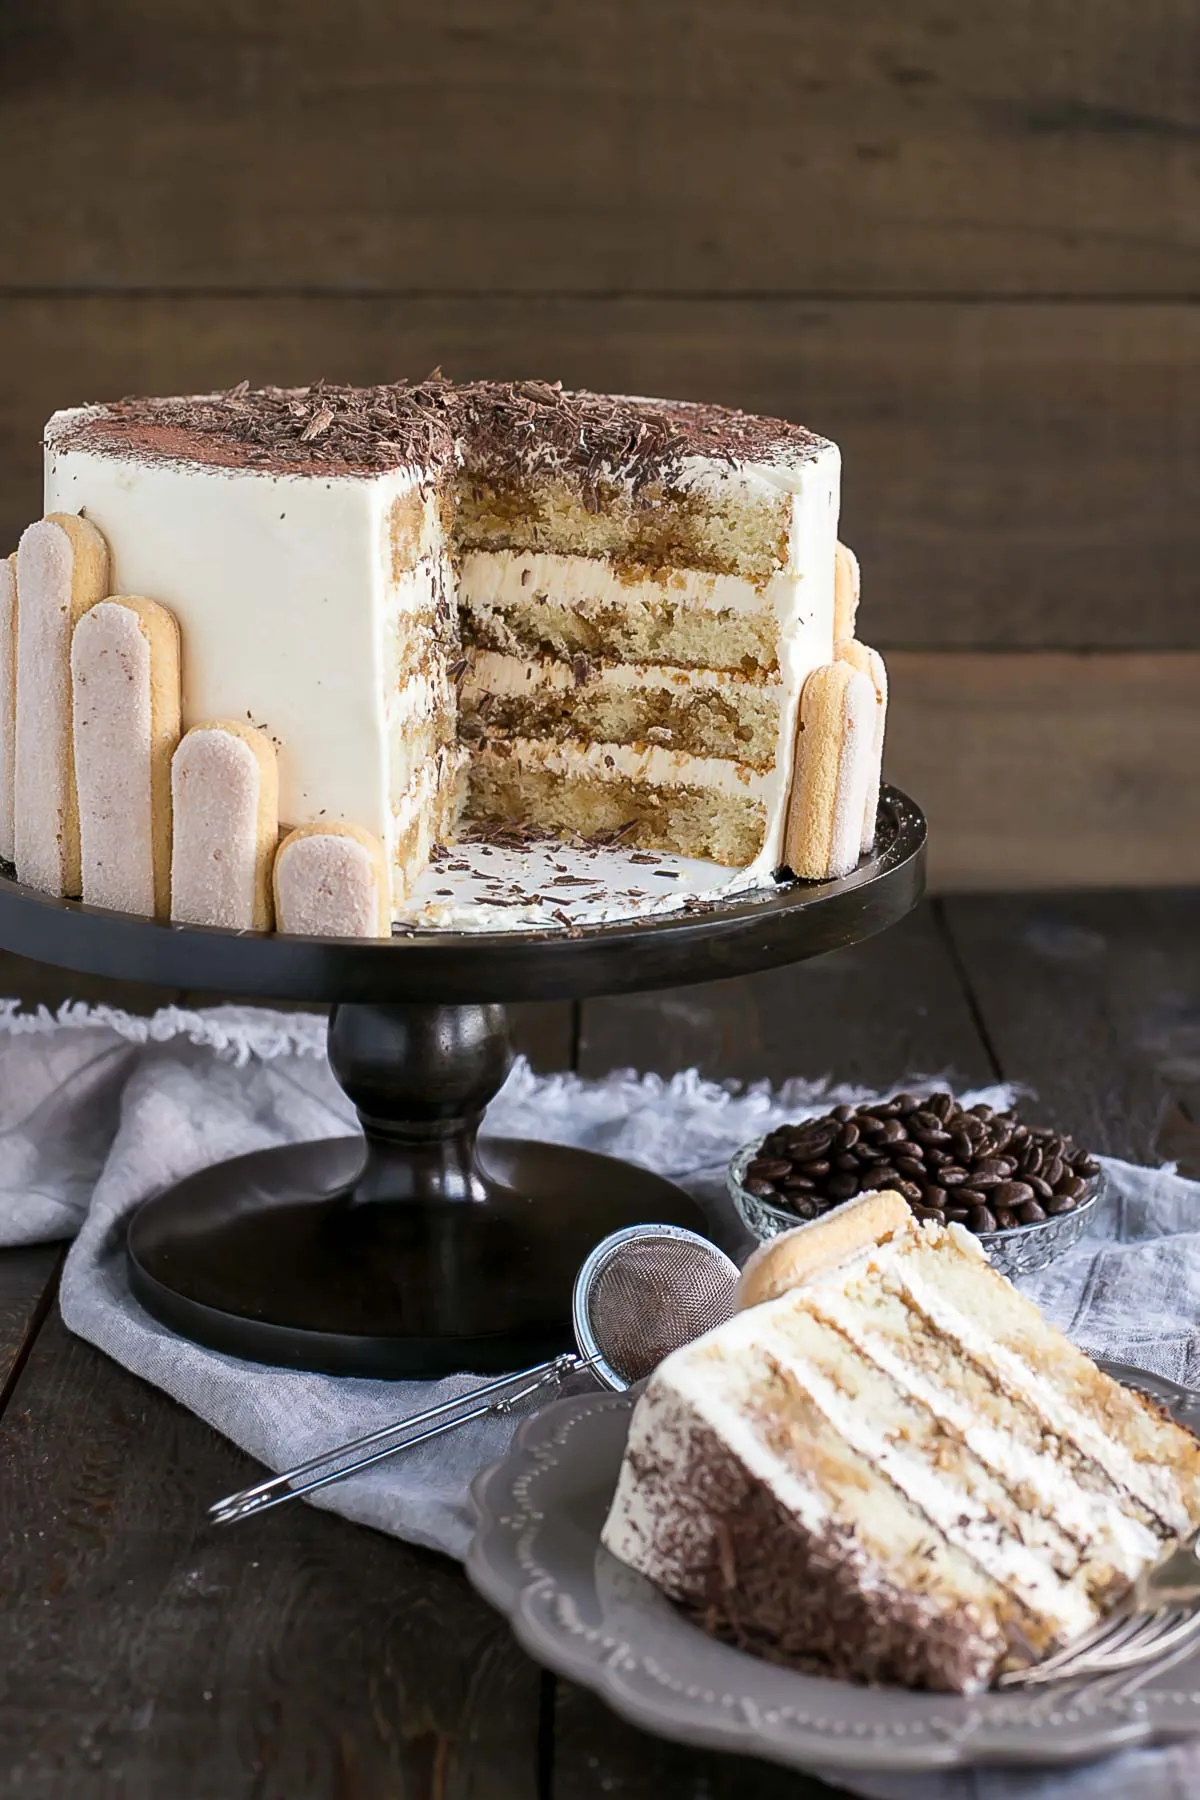
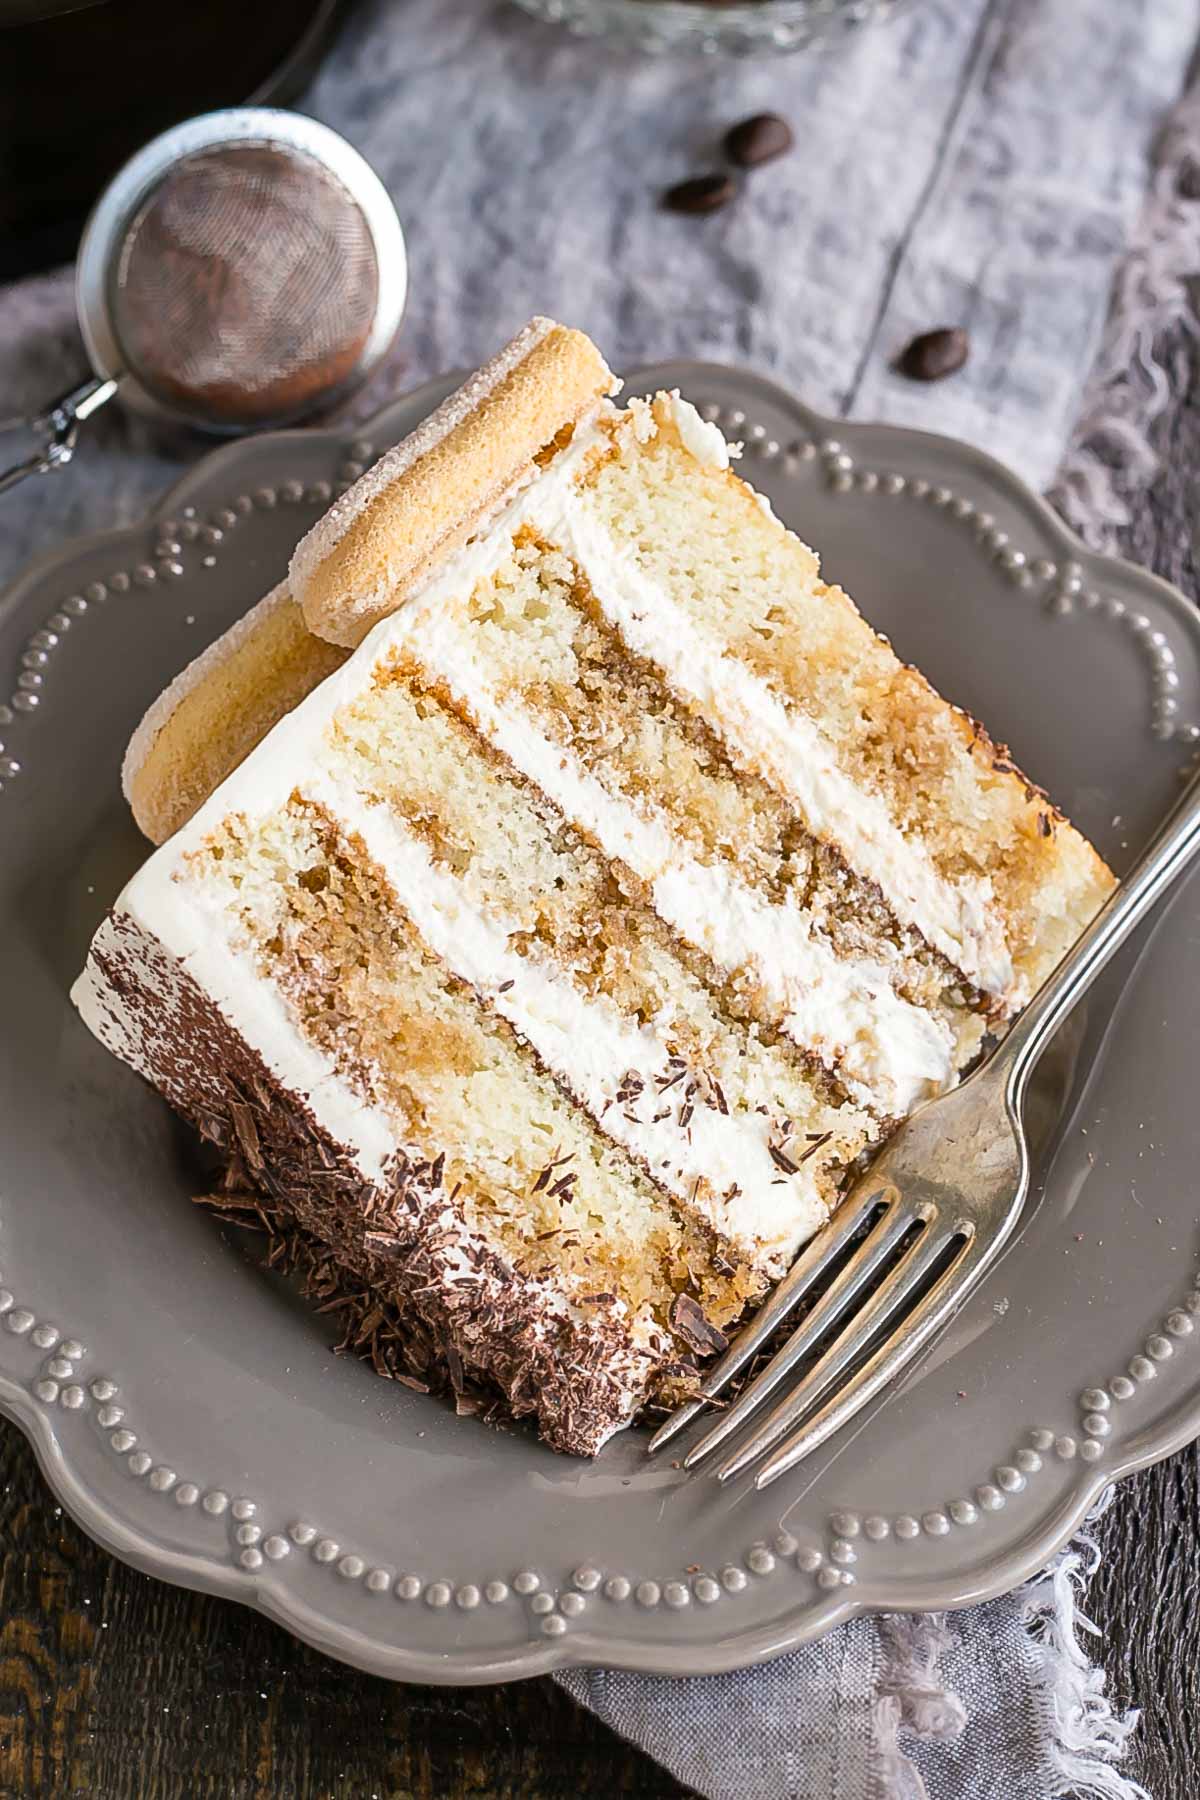
Really, it tastes just like tiramisu. You could just have tiramisu, but this way is better because it’s a CAKE.
Those coffee soaked layers are some of the best I’ve ever had. And the mascarpone buttercream has just the perfect balance of flavors. It’s a bit heavier than what you’d see in a traditional tiramisu, but I wanted the cake to have more structural integrity. Plus, I love a good buttercream.
If you love tiramisu and are looking for something a little different, then this Tiramisu Cake is for you!
FREQUENTLY ASKED QUESTIONS
How can I convert this recipe?
- The recipe as-is will also work in three 6″ pans. For three 8″ pans, 1.5x the recipe. Baking time may need to be adjusted.
- To make cupcakes, all you need to do is reduce the baking time — start checking at 15mins or so. The recipe will make 18-24 cupcakes depending on size.
- For other conversions go here.
Can I make it in advance?
- The cooled cake layers can be baked ahead of time, double wrapped in plastic wrap, and frozen for up to 3 months. Take out 2-3 hours before assembly.
- The frosting can be placed in an airtight container and refrigerated for 1 week for frozen for 3 months. Bring to room temp and rewhip before using.
- The simple syrup can be stored in an airtight container in the fridge for a couple weeks.
- The finished cake (whole or sliced, stored airtight) can be frozen for up to 3 months.
Can I get the measurements by weight/grams?
- There is a Metric option in the recipe card. If you click it it will convert everything to grams.
- This conversion is done automatically and I cannot guarantee the accuracy but many readers have had success using the metric option for this recipe.
Comments
Post a Comment