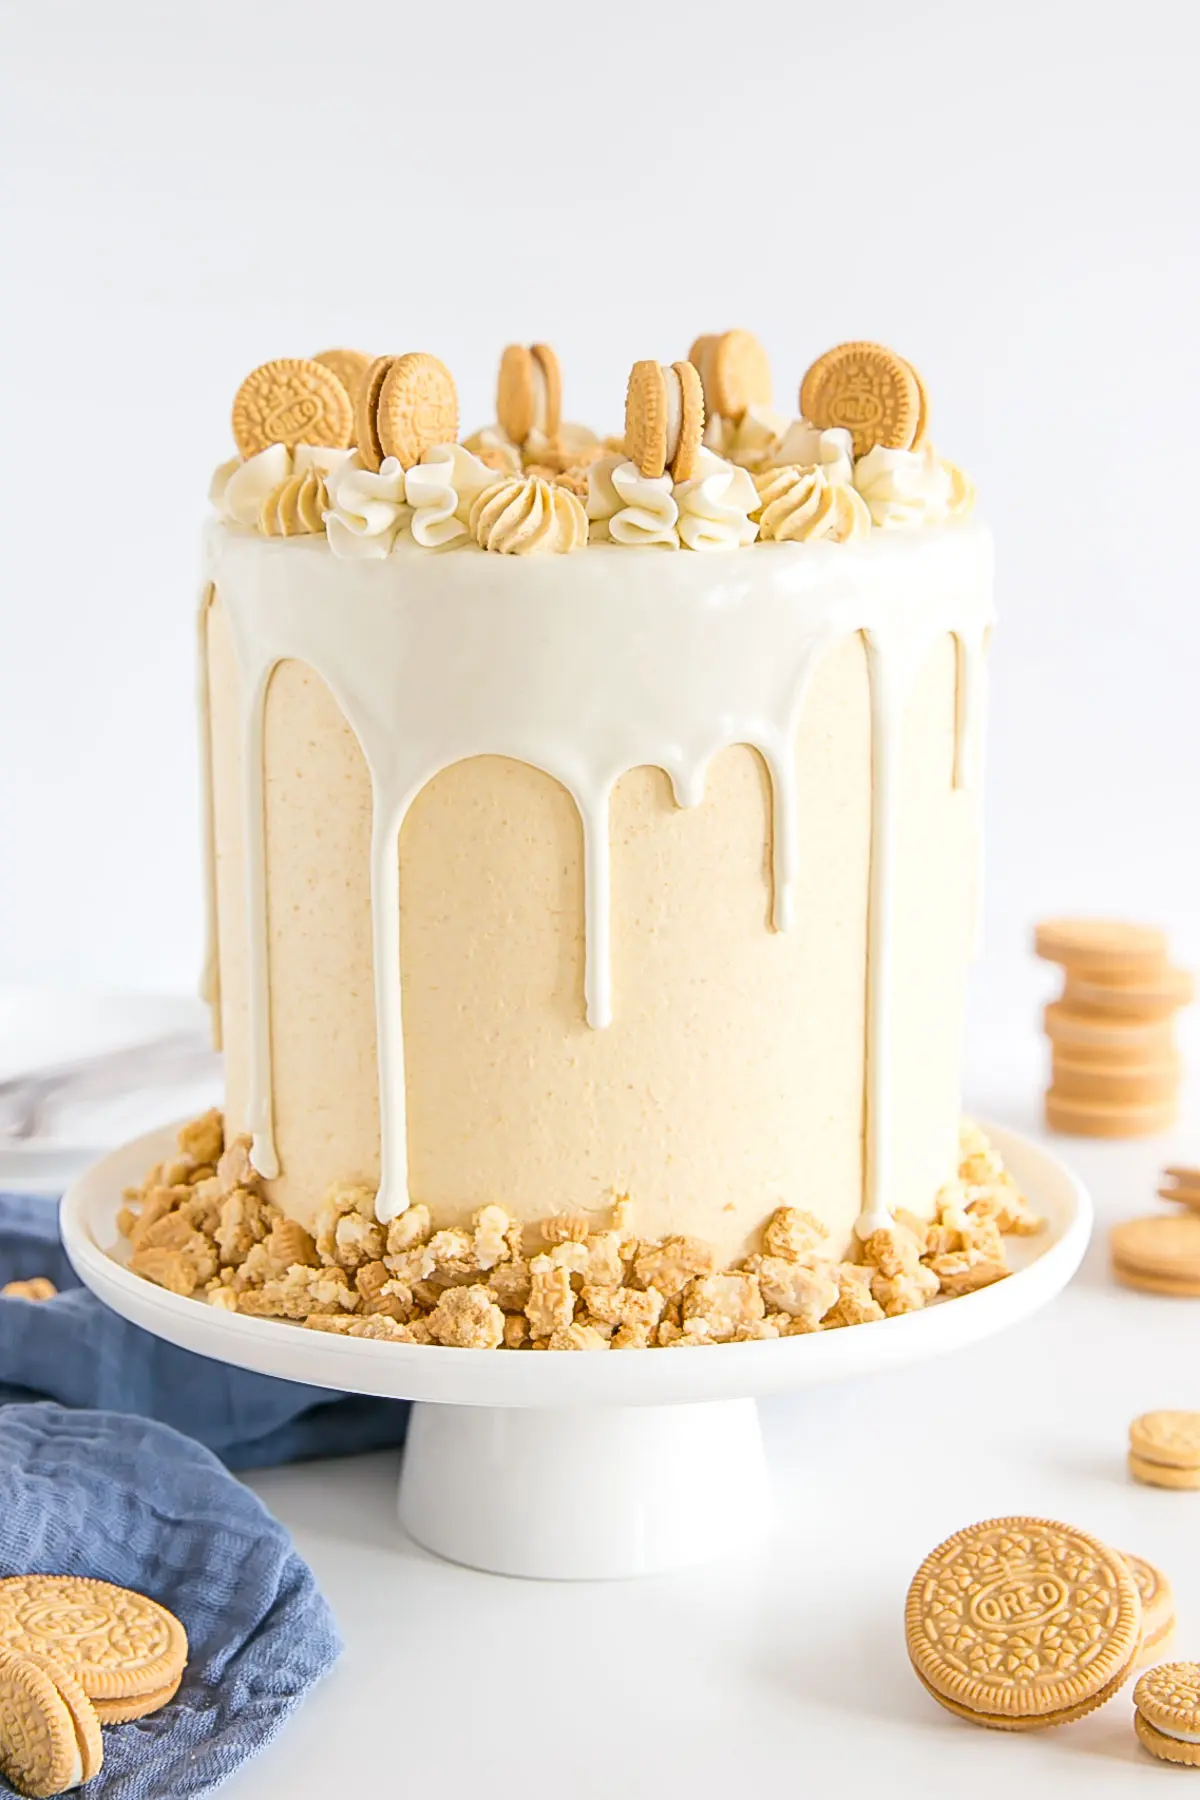
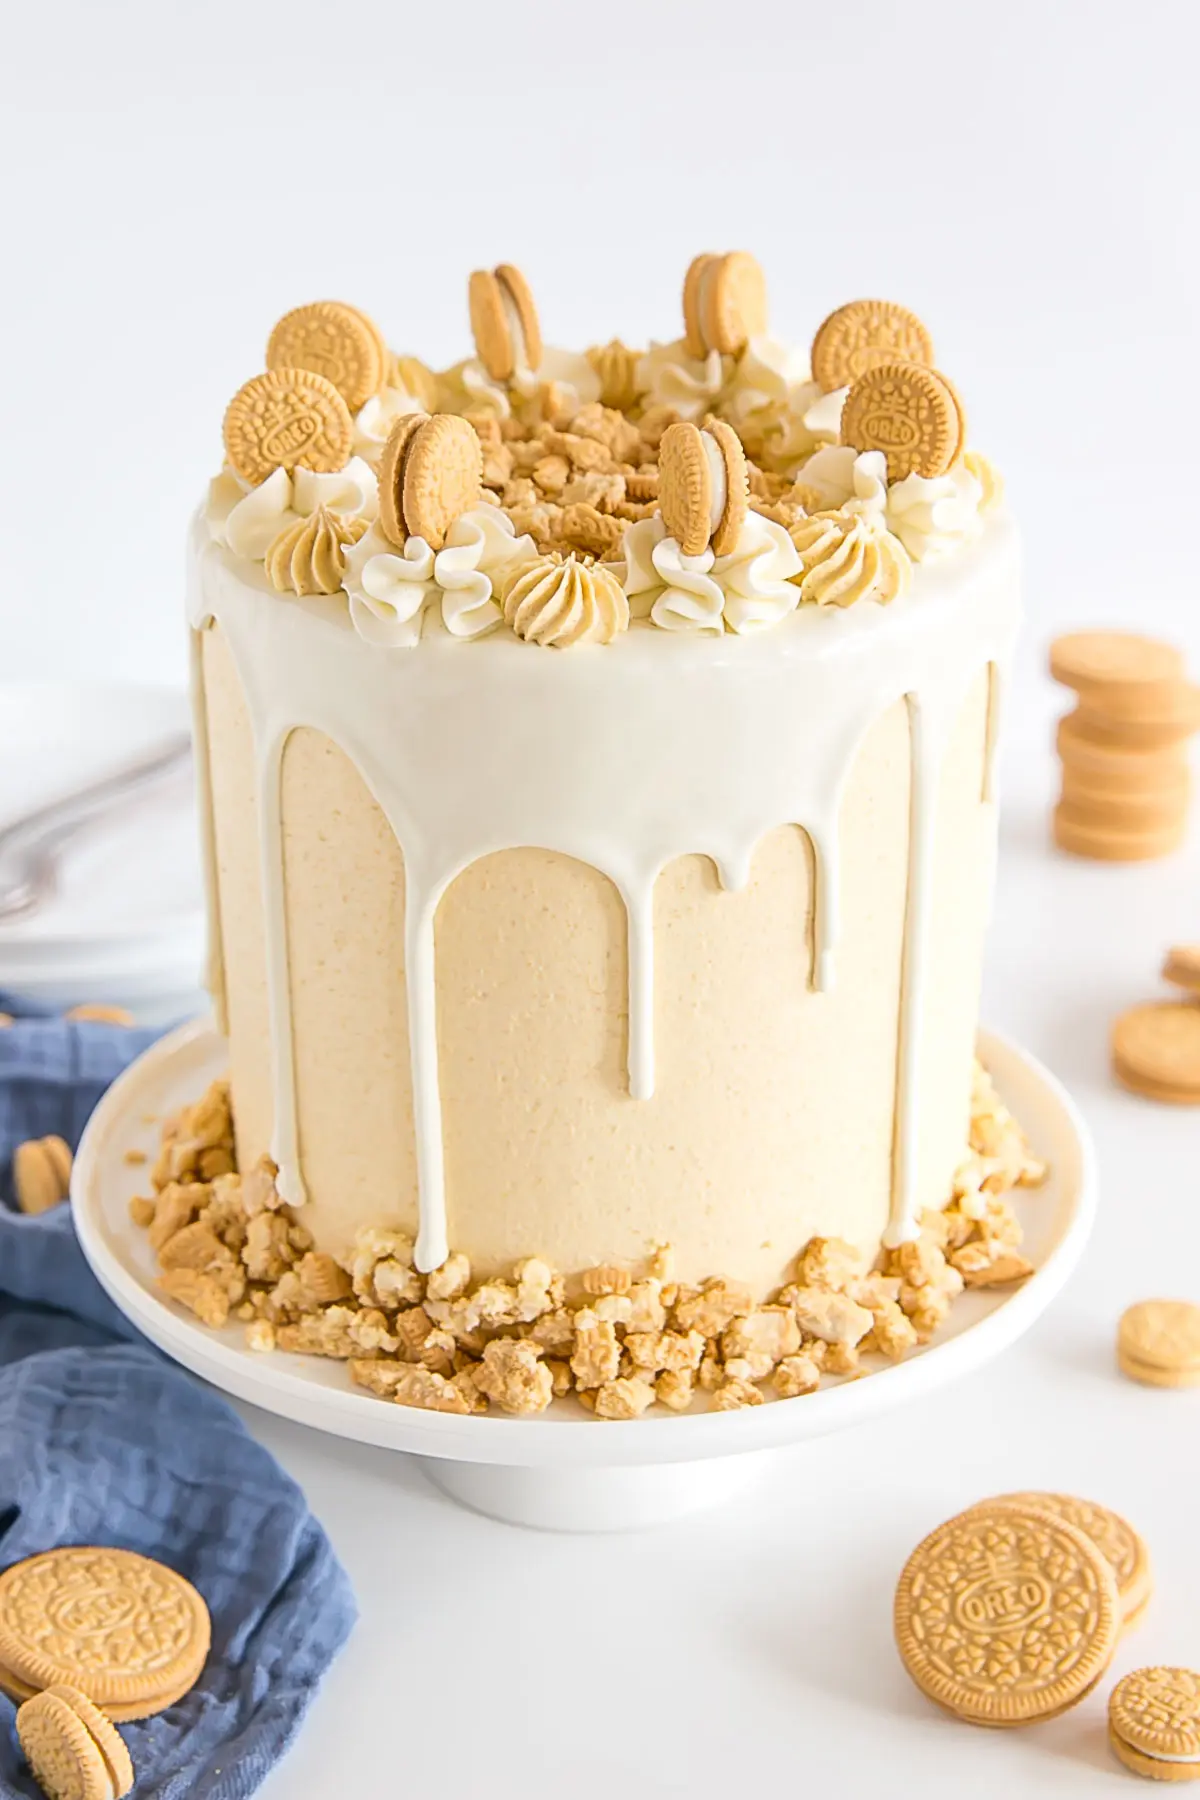
Golden Oreo cake layers with a delicious cookie buttercream and a simple white chocolate ganache. The vanilla version of your favorite cookies and cream cake!
This Golden Oreo Cake has been a long time coming. I had intended to make it years ago but updated and revamped my Oreo Cake recipe instead. The irony is that I much prefer Golden Oreos to any other kind — original included.
There is just something about the combination of that delicious Oreo filling with the vanilla cookie shells. They are super addictive and don’t last long around here.

How to Make this Golden Oreo Cake
For the cake layers themselves, I simply took my Vanilla Cake recipe and added chopped/crushed Oreos to it. The ingredients are simple:
- flour
- baking powder (not soda)
- salt
- unsalted butter
- granulated sugar
- eggs
- vanilla (I used clear vanilla extract)
- milk
- chopped Golden Oreos
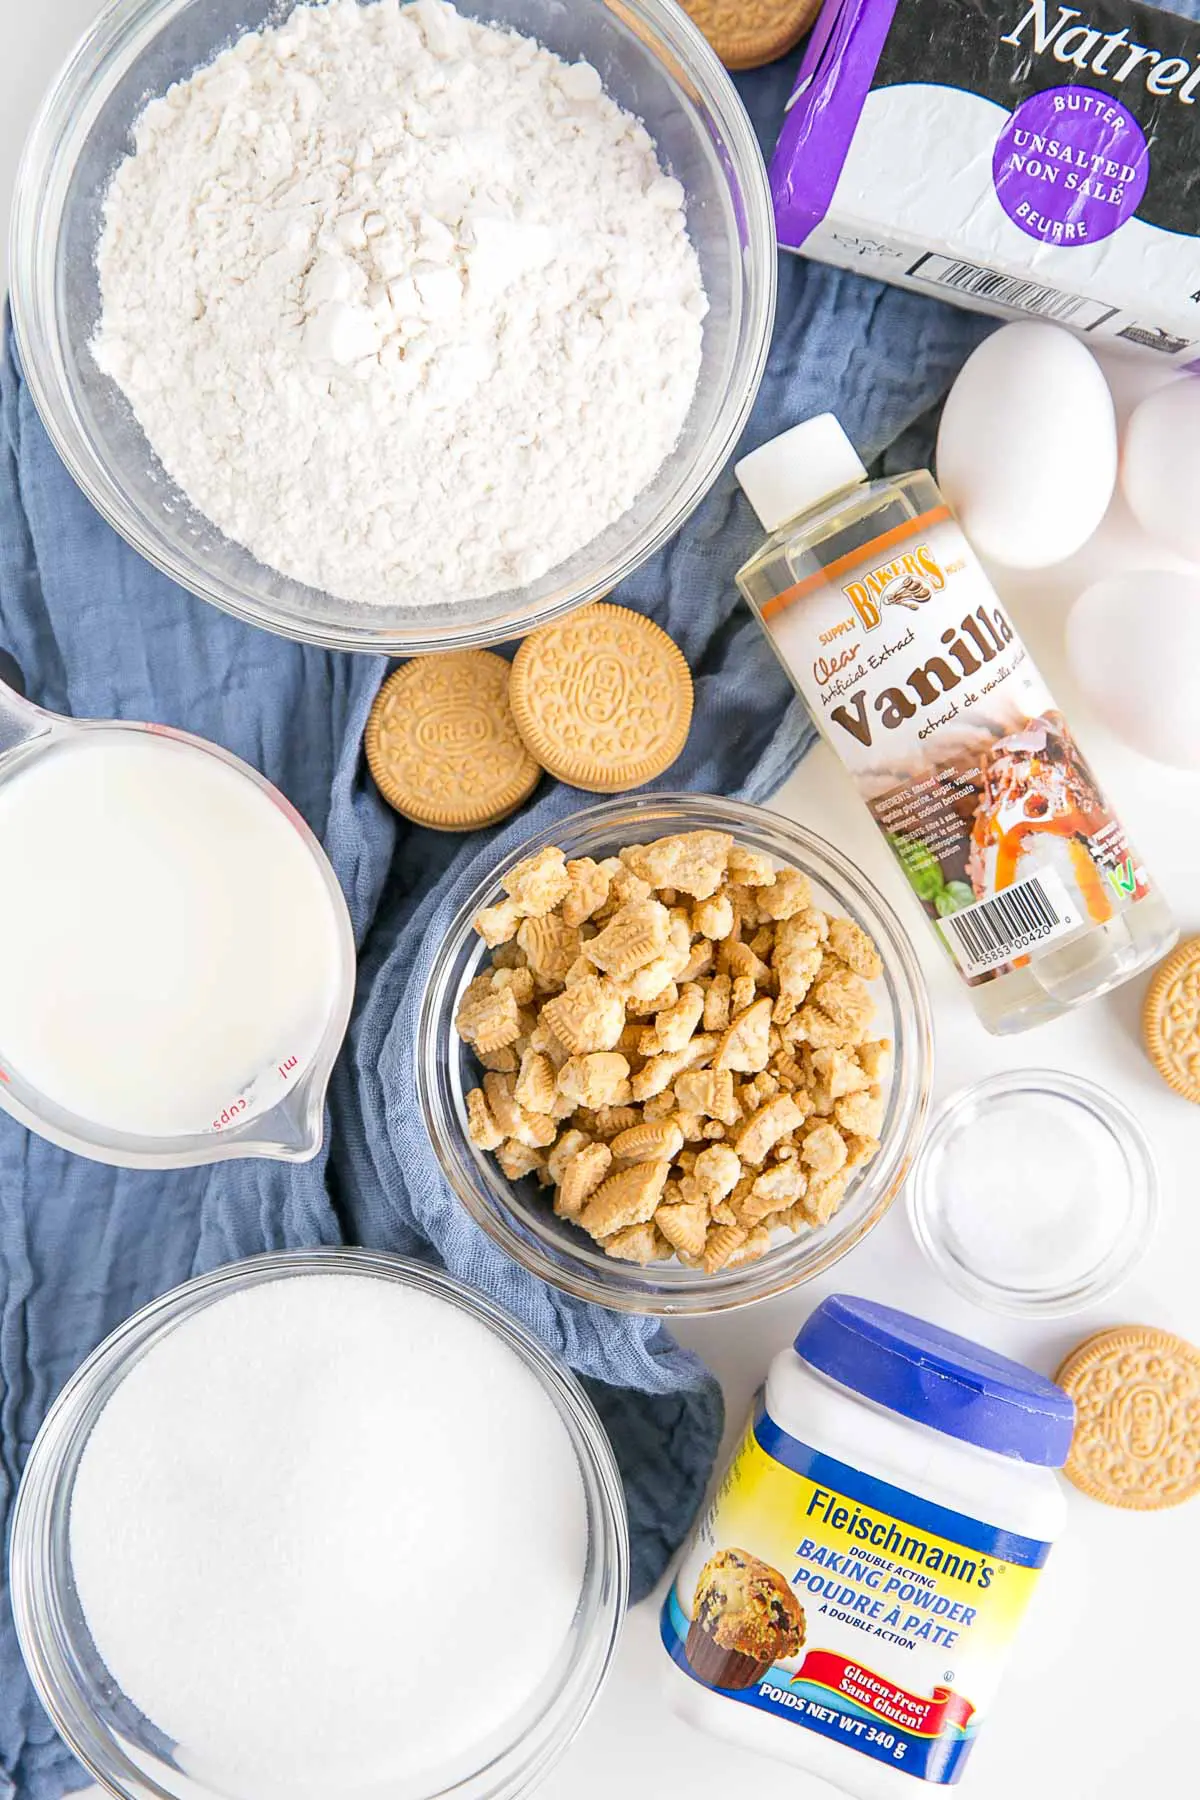
I used clear vanilla extract in the cake instead of regular vanilla as I find that it has more of a candy-like flavor to it and I thought it would go perfect with the Golden Oreo Cake.
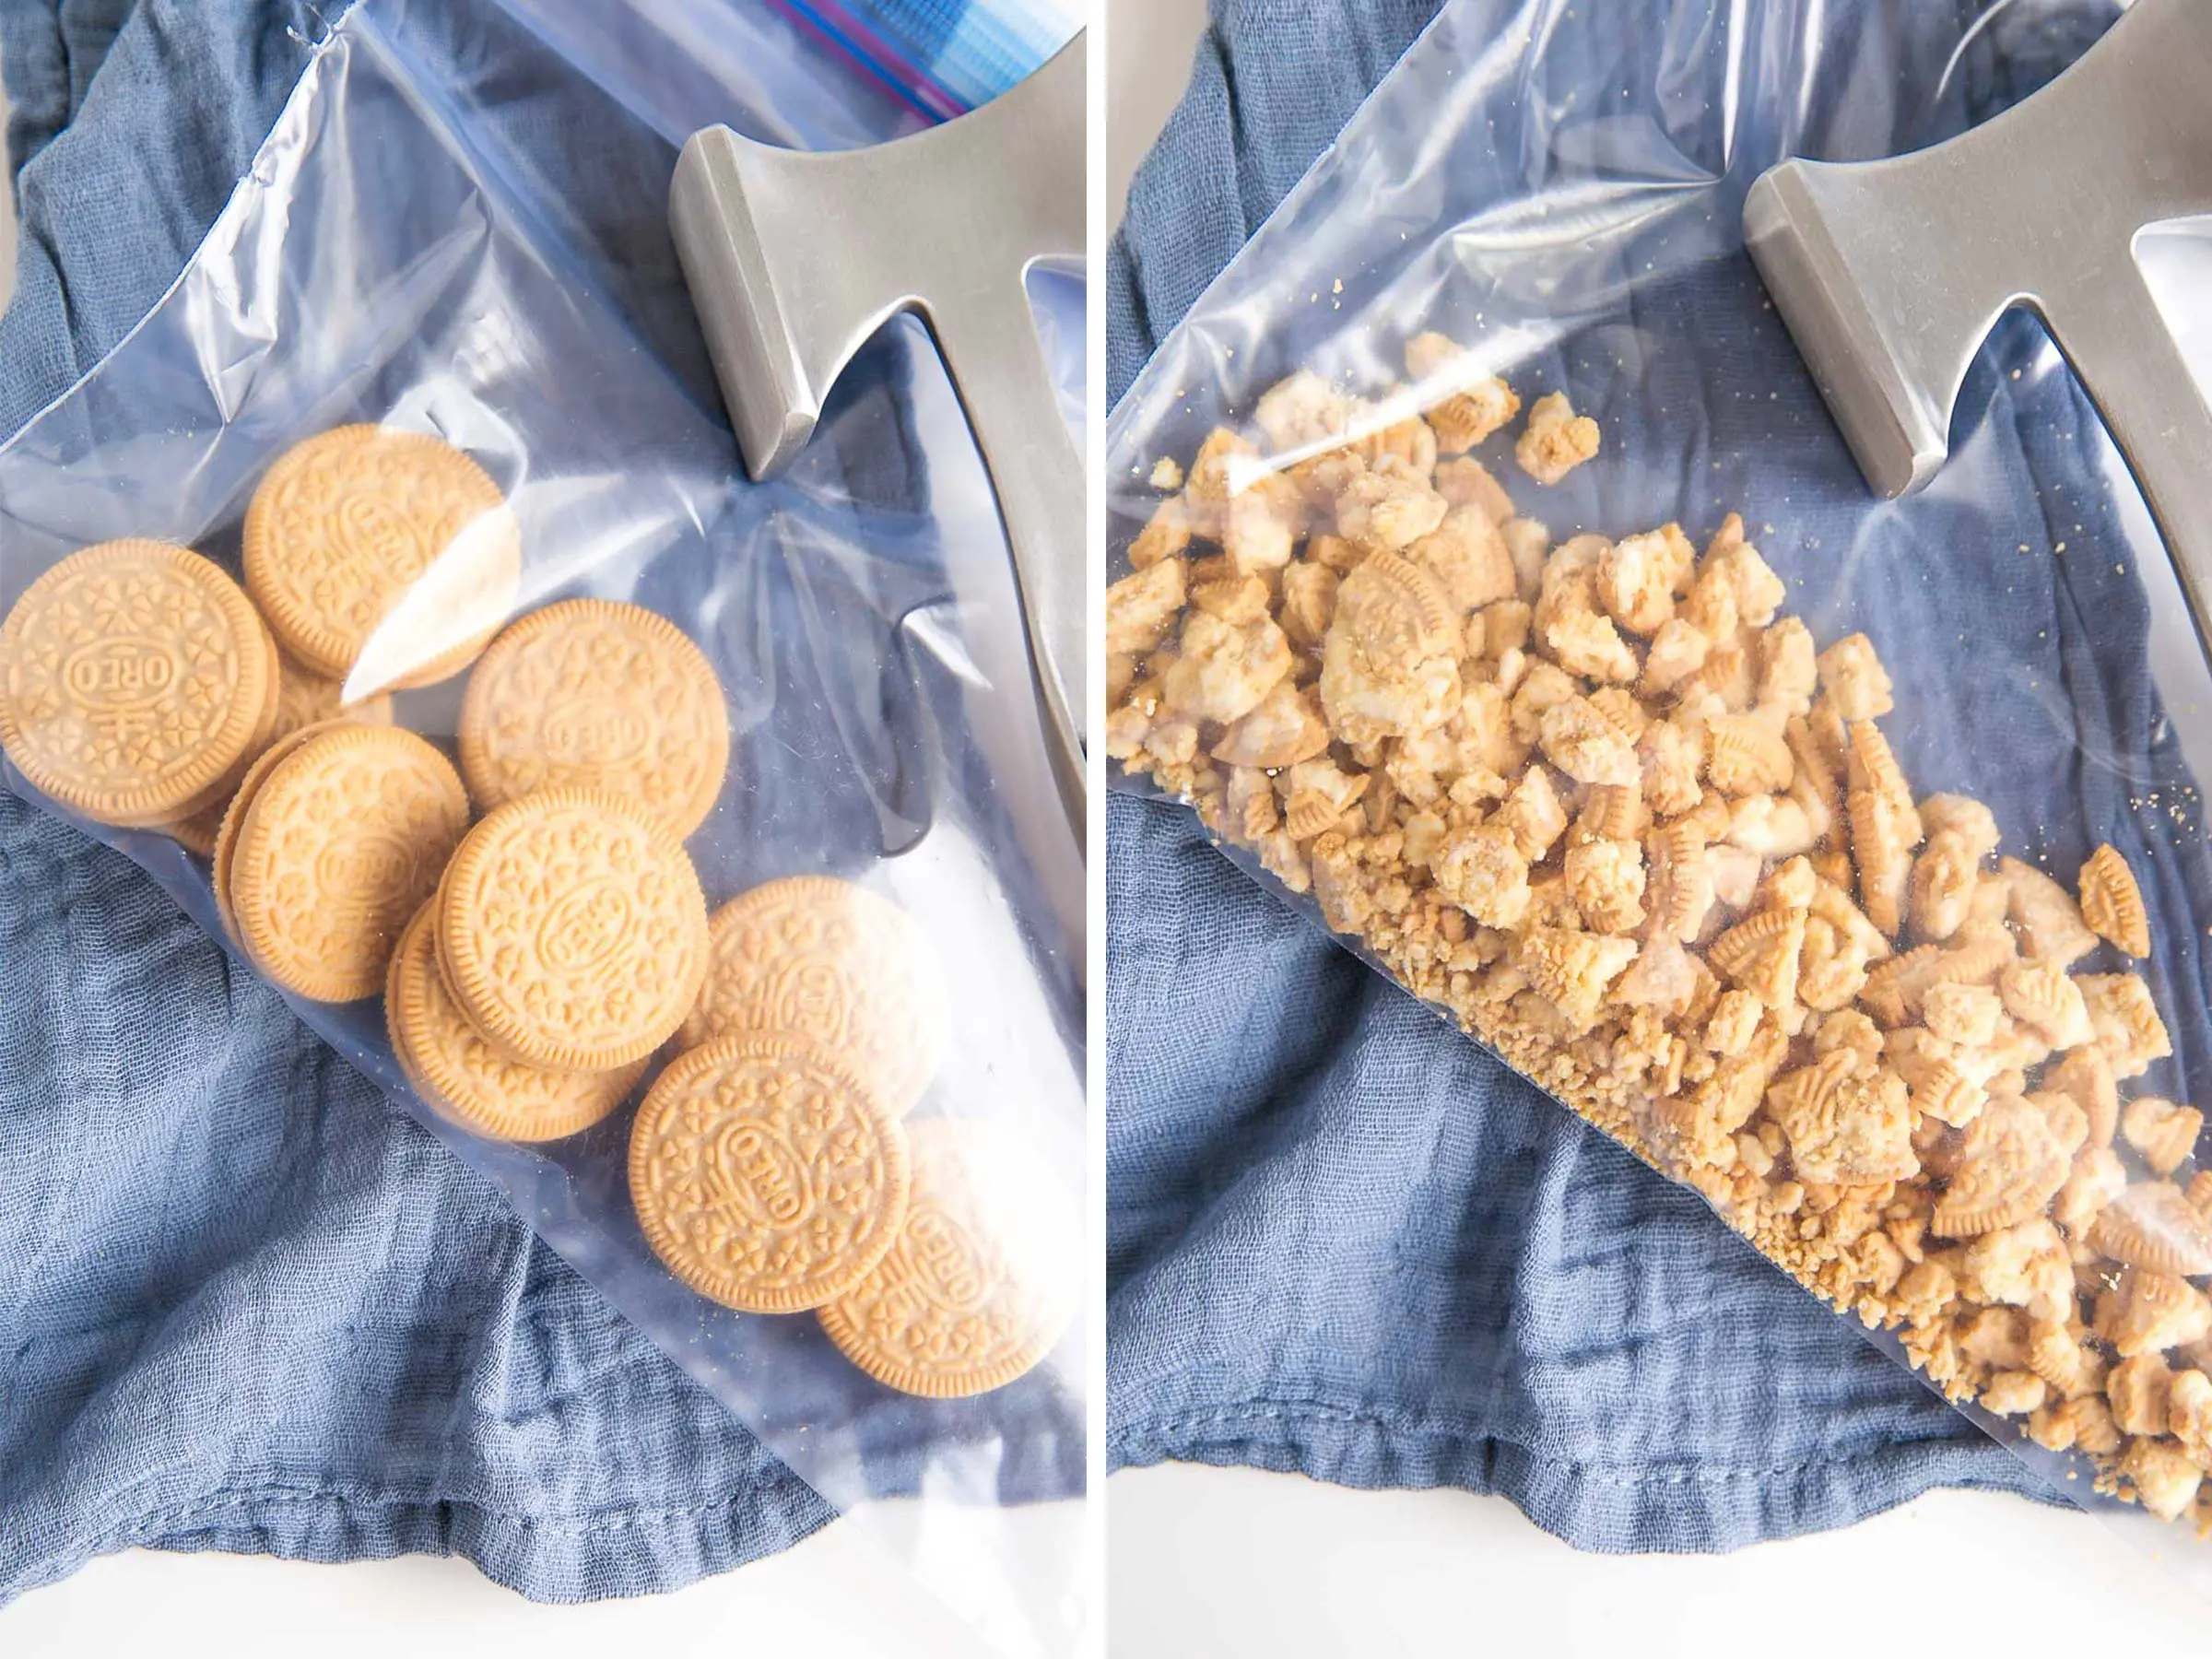
For the Oreos themselves, I placed them into a large ziploc bag and crushed them up with a mallet. You could toss them in a food processor instead and pulse them, but I find it’s less cleanup this way and I can more control the size of the chunks.
For the cookie pieces, it’s important to gently fold them into the batter at the end so you don’t overmix the cake batter.
The layers baked up beautifully.

Golden Oreo Buttercream
For the buttercream, I made my Swiss Meringue buttercream recipe with clear vanilla extract and added Golden Oreos to it.
I used 10 double-stuffed Golden Oreos, scraped out the filling into a small microwave-safe bowl and I heated it in short 10 second bursts until I could stir it together as a thick paste. I added this right into the vanilla buttercream. I’ll be honest that it didn’t add a ton of flavor. If you like you could try this with even more filling.
For the remaining 20 individual cookies, I pulsed those in a food processor to get a fine powder.
I’m not convinced the mallet wouldn’t do a better job here. You want a very fine powder from the cookies. I sifted the cookie crumbs through a fine-mesh strainer and ended up crushing the larger remaining pieces in a bag with a mallet. Next time I’d just stick with the bag and mallet instead.
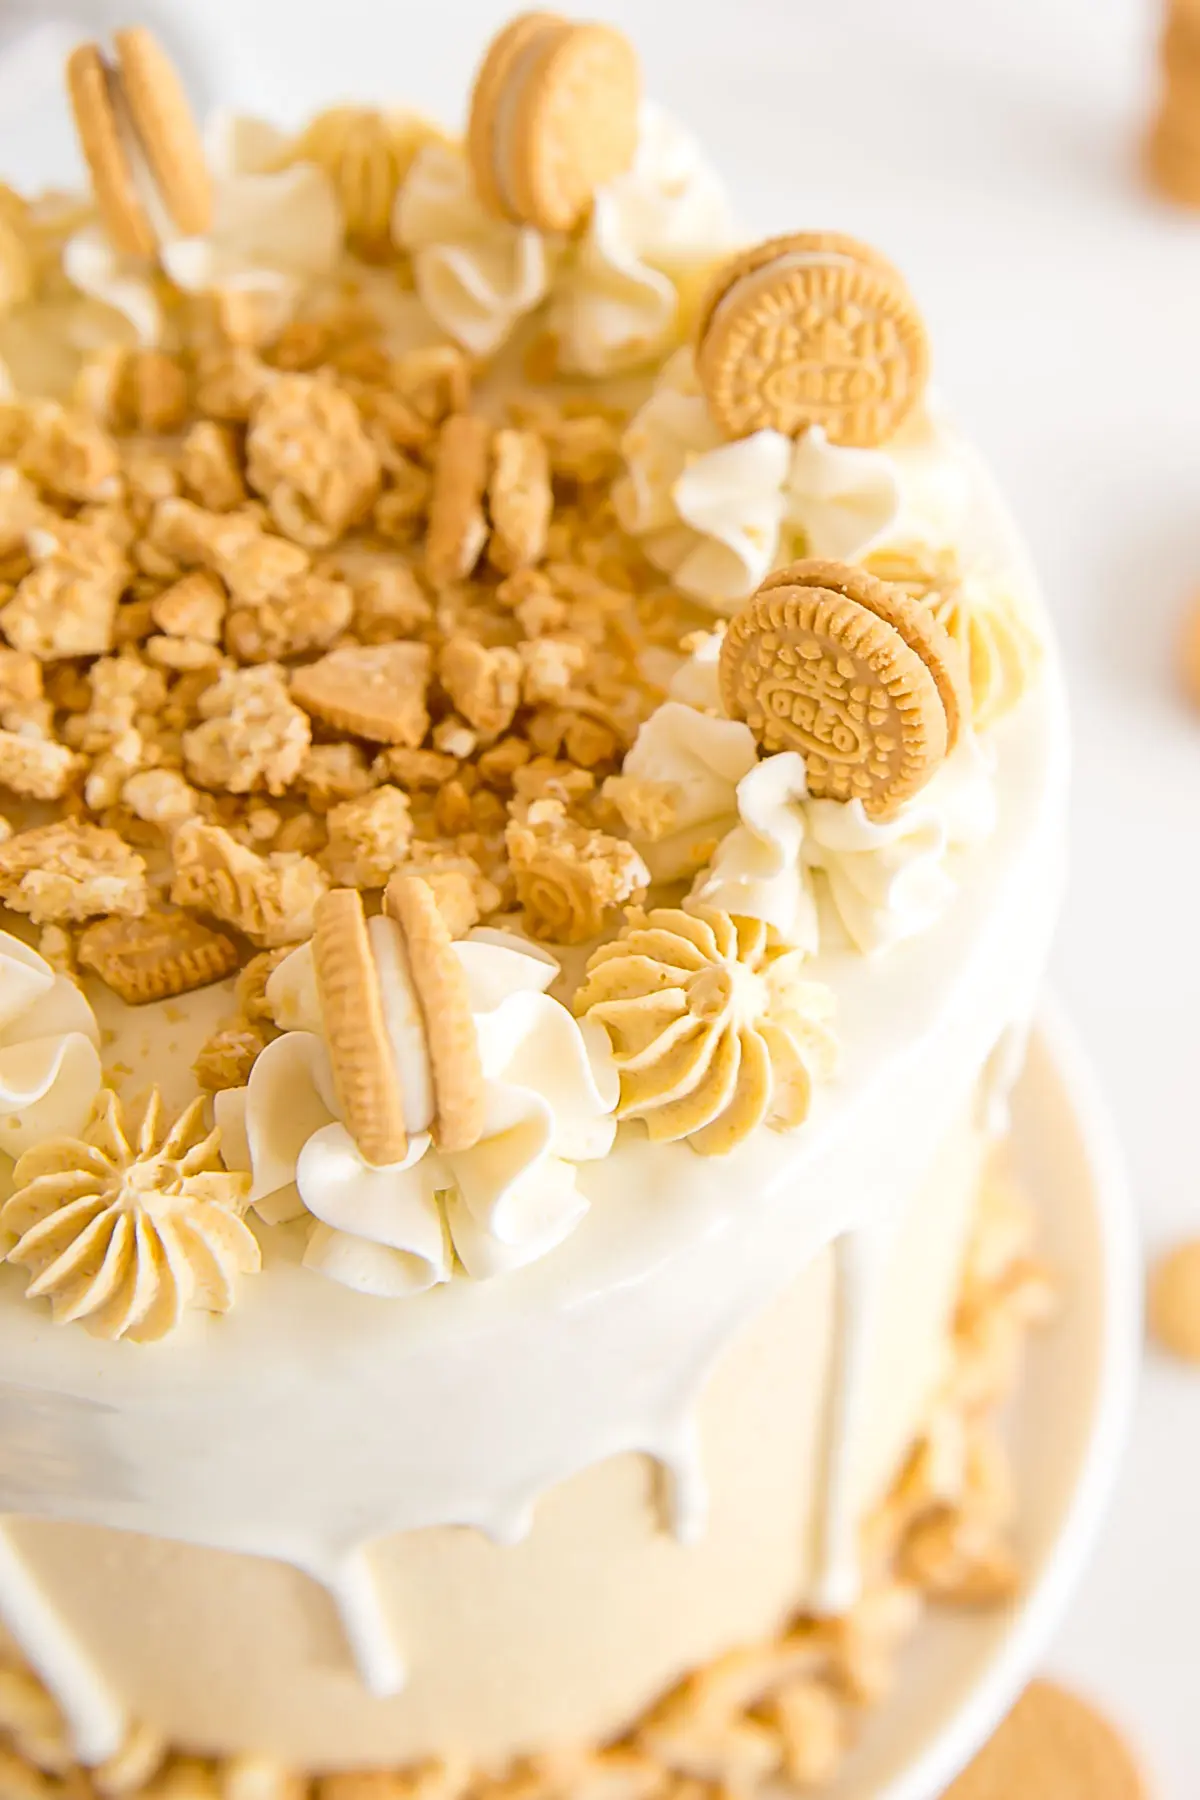
I ended up adding some Gold color gel to the cookie buttercream to make the yellow pop a bit more.
Decorating the Cake
I’m going to recommend doing things slightly differently than I did, but you can choose to do what you like.
I ended up filling the cake with the plain buttercream (with the Oreo filling but without the crumbs) because I thought it would look more like an Oreo — the yellow cake layers and white filling. While I do like the way it looks, that Oreo Cookie buttercream is where it’s at and I feel like it’s missing a bit from between the layers.
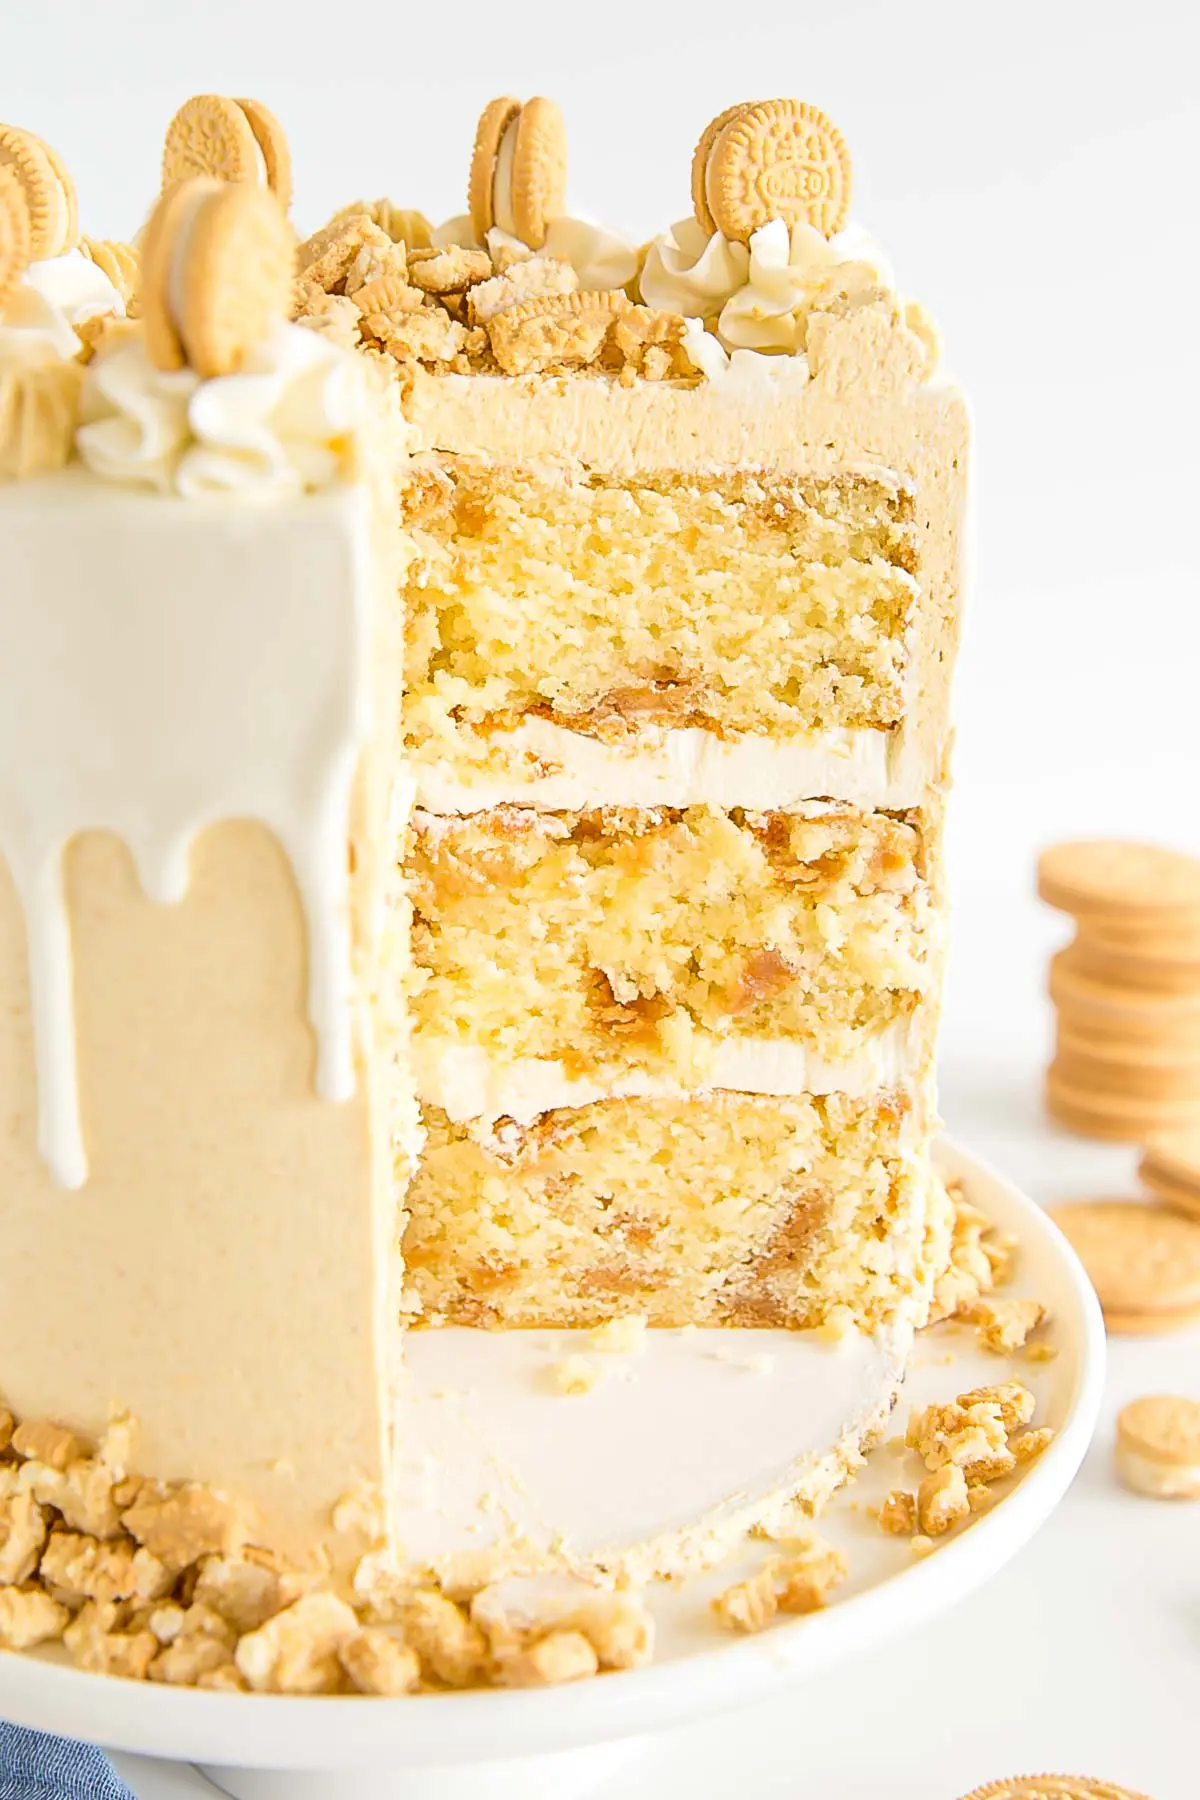
You could also sprinkle some chopped Oreos on top of each layer which I had intended to do but had a brain fart and forgot.
So your options for filling are:
- White buttercream without the cookie crumbs or chopped Oreos (this is what I did and don’t recommend it)
- White buttercream with chopped Oreos on top (for best color contrast)
- Oreo Cookie buttercream with chopped Oreos on top (will have the most flavor impact plus added texture)
Either option you choose though will be delicious. It’s just a matter of preference!
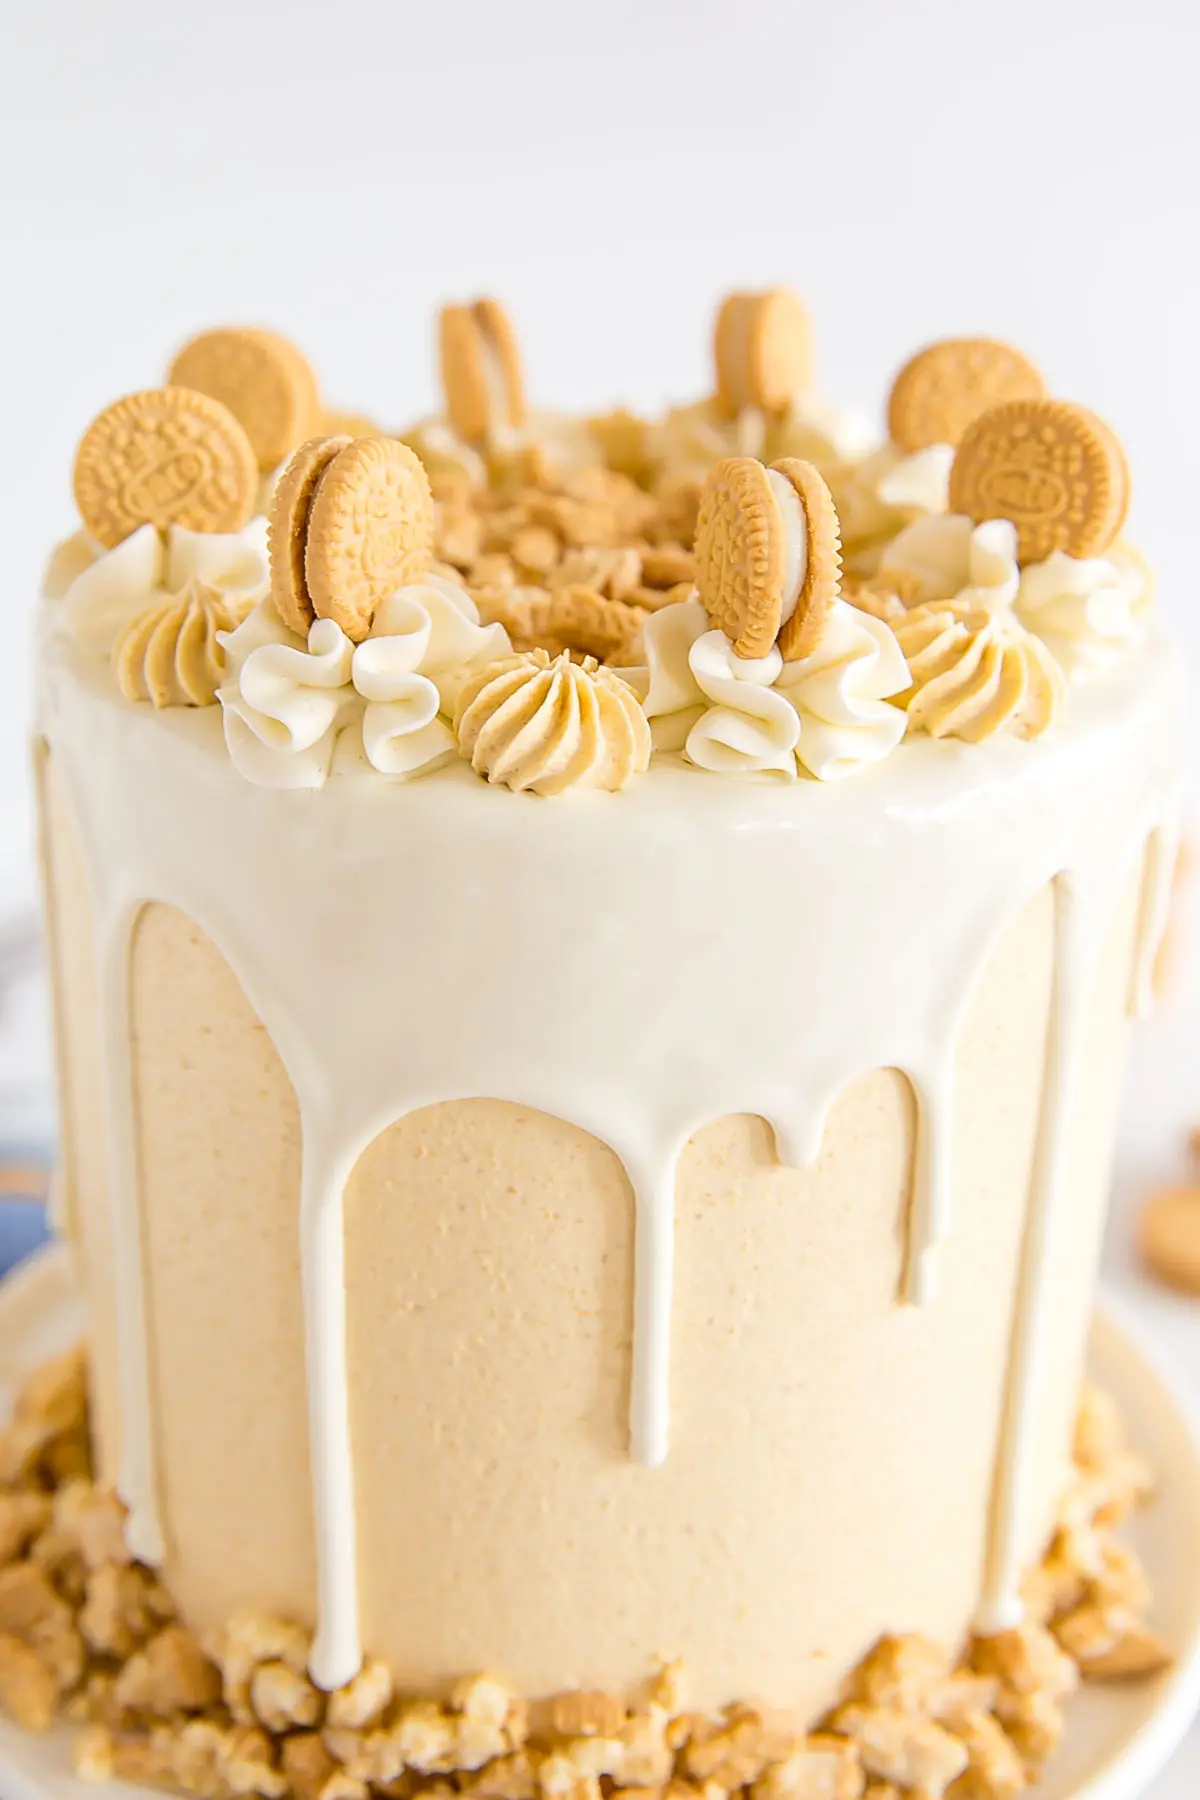
After filling and chilling the cake I frosted it with the Golden Oreo buttercream, added a white chocolate drip, alternated some colored dollops on top.
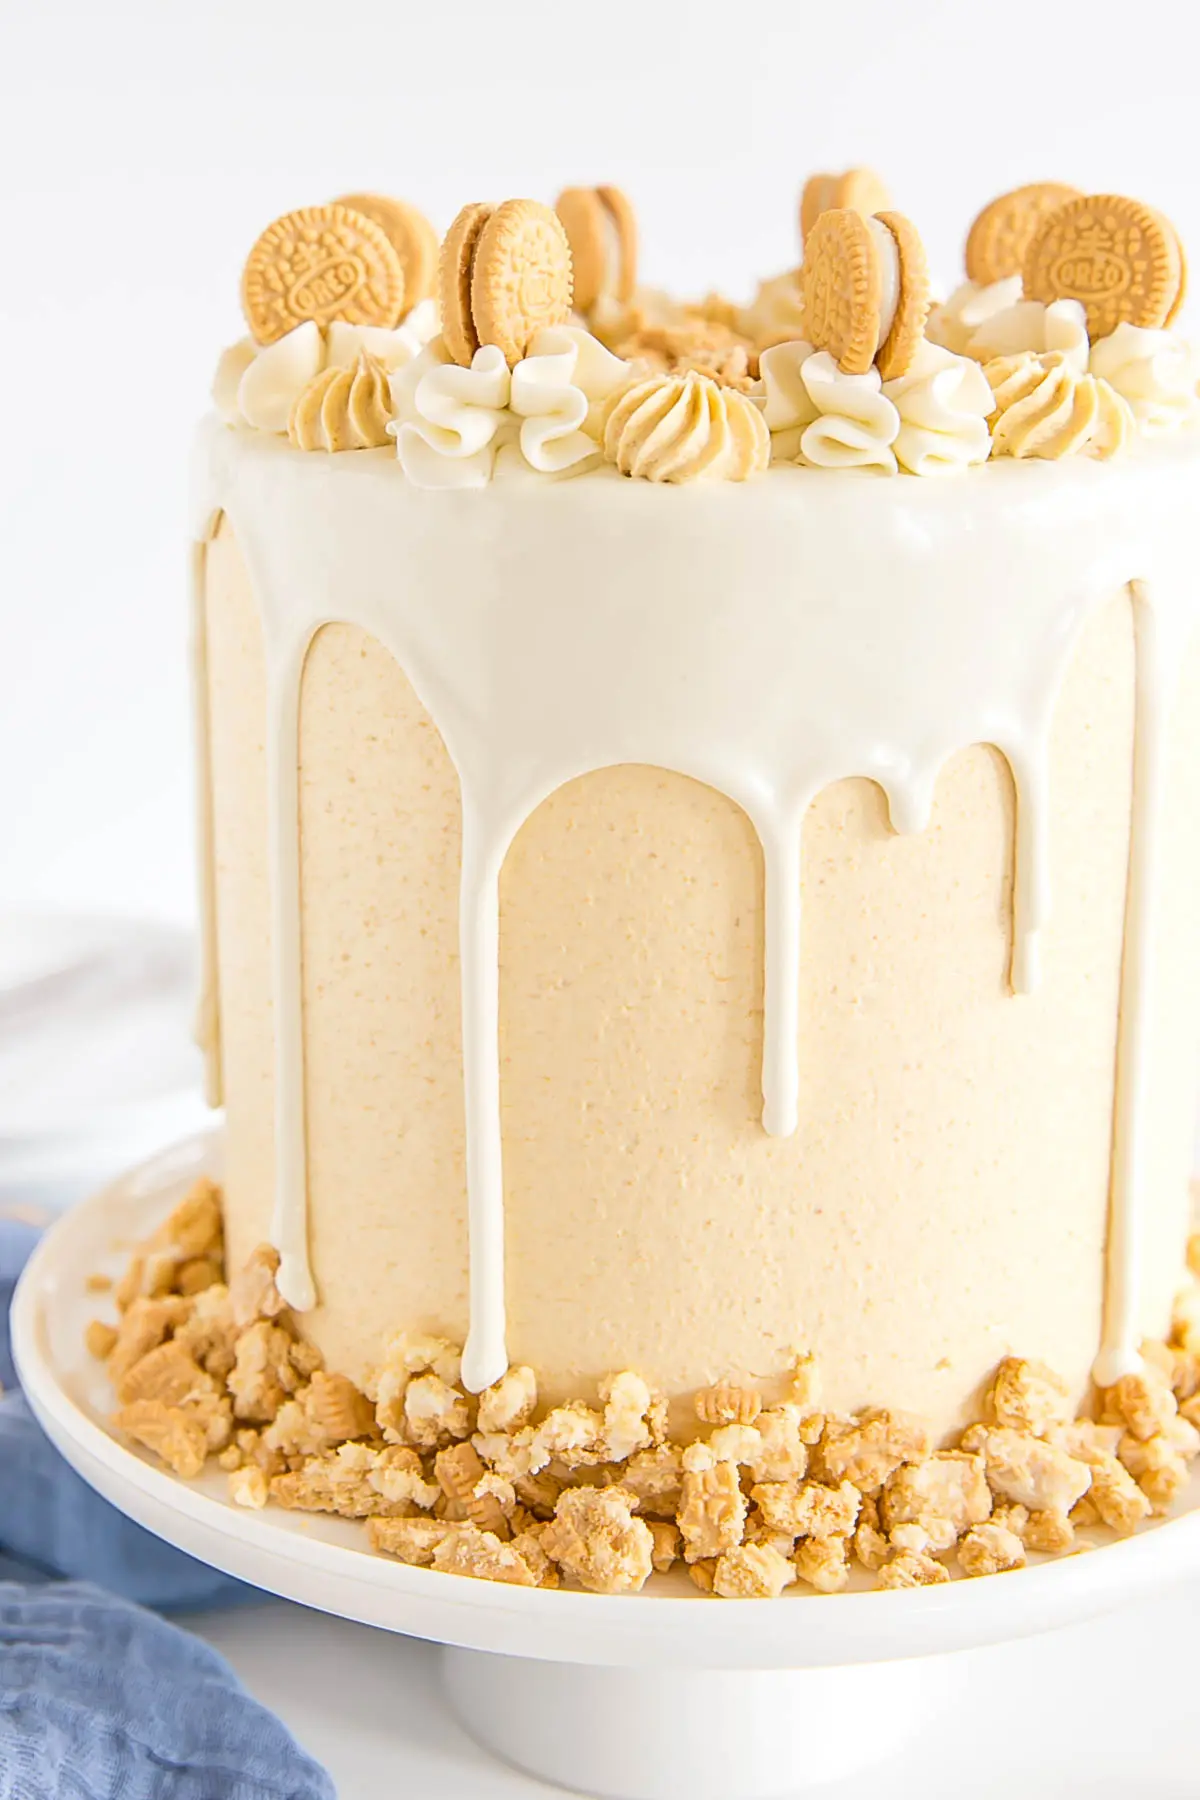
White Chocolate Ganache
For the white chocolate ganache, I ended up adding a touch of violet and as well as some bright white color gel to neutralize the yellow a bit. It’s optional, but might be a good idea depending on how yellow your white chocolate is. You can read more about my tips here.
I was SO excited to find mini Golden Oreos here! I had never seen them in stores before and when I googled them I couldn’t find them on Amazon or any local stores. It was total fate when I went into a grocery store last week and took a different door in than I usually do and THERE THEY WERE.
Just to the left as I walked in. Had I gone the other door I wouldn’t have seen them and at this point, I wasn’t thinking to even check the aisle for them because I didn’t think they existed in Canada! Coincidentally, they didn’t have any in the aisle so it really was fate.
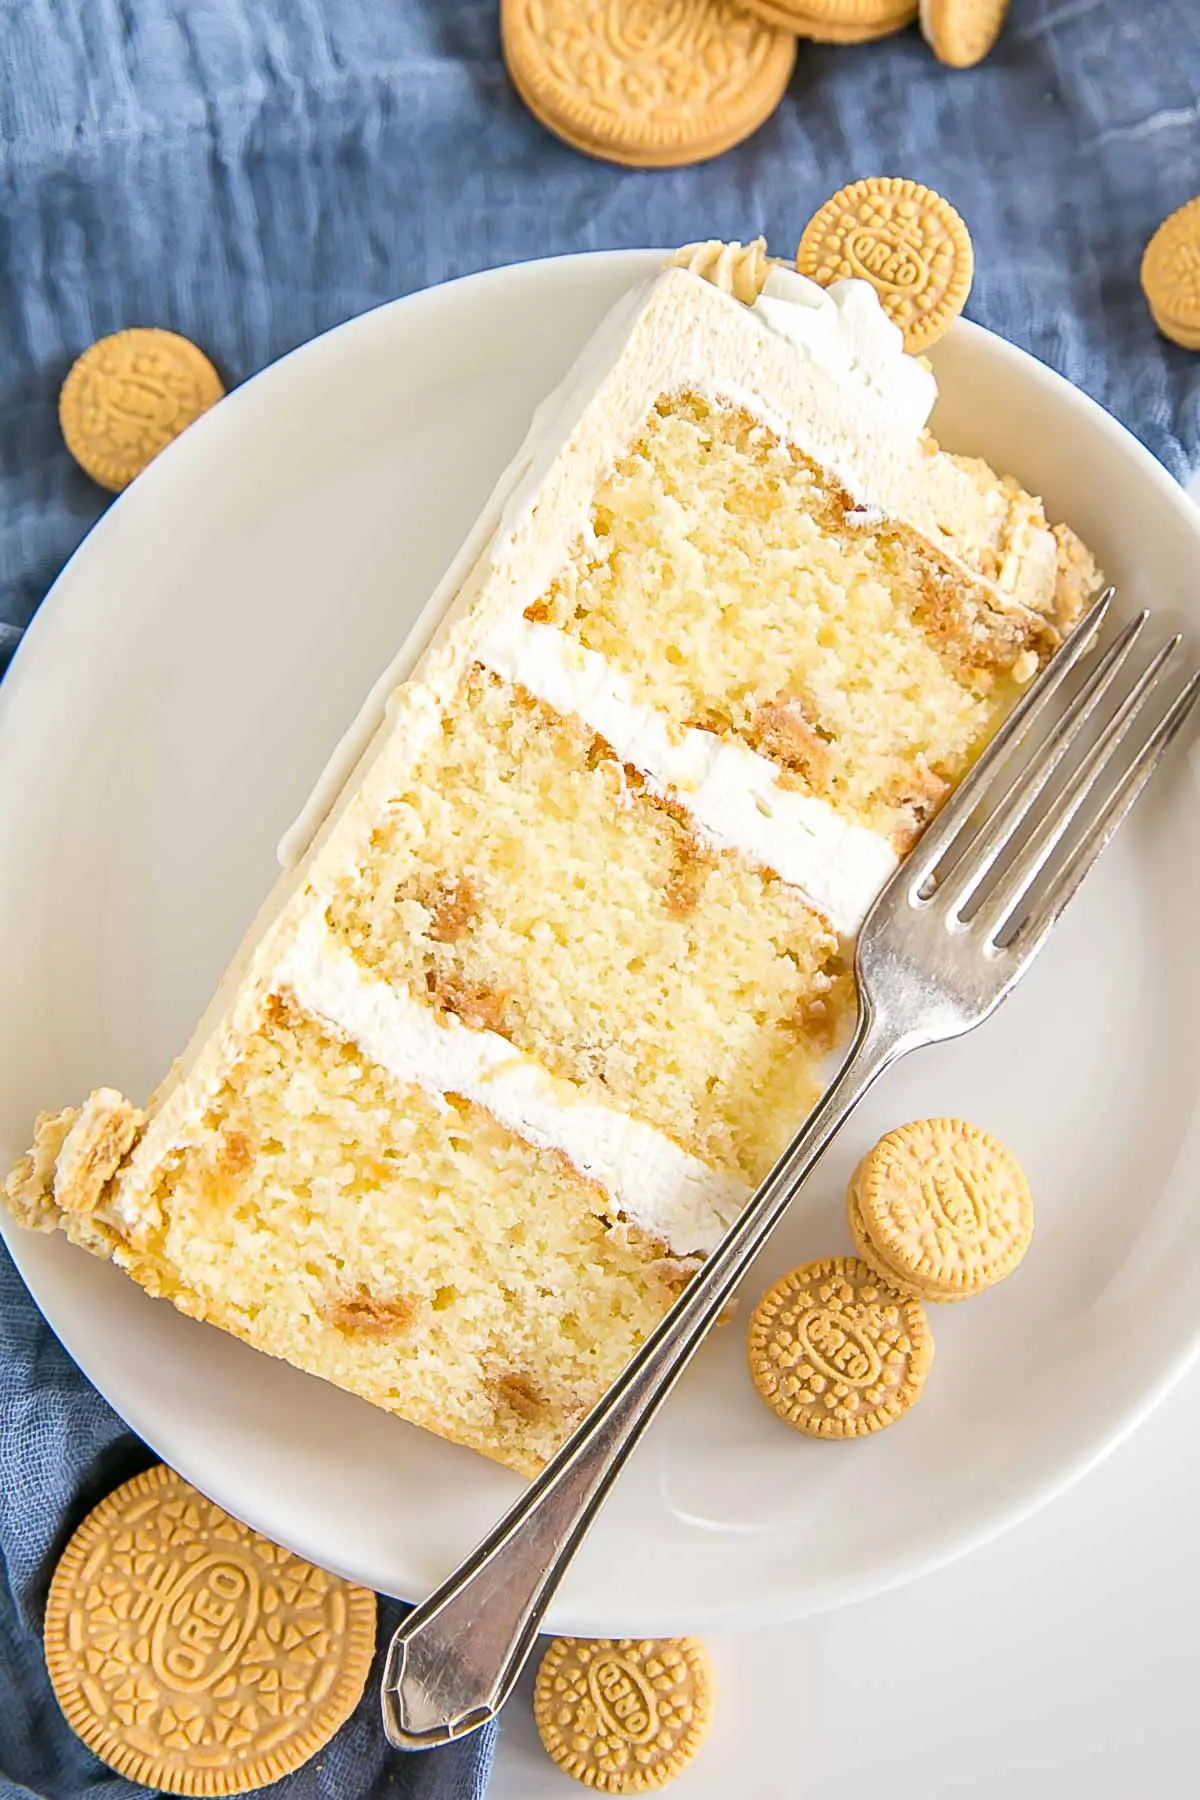
The cake layers are moist and delicious with crunchy bits of Golden Oreos peppered throughout. The cookie frosting is to DIE for. So good. If you’re a Golden Oreo fan like I am you will LOVE this cake.
FREQUENTLY ASKED QUESTIONS
How can I convert this recipe?
- The recipe as-is will also work in two 8″ pans. For three 8″ pans, 1.5x the recipe. Baking time may need to be adjusted.
- To make cupcakes, all you need to do is reduce the baking time — start checking at 15mins or so. The recipe will make 18-24 cupcakes depending on size.
- For other conversions go here.
Can I make it in advance?
- The cooled cake layers can be baked ahead of time, double wrapped in plastic wrap, and frozen for up to 3 months. Take out 2-3 hours before assembly.
- The frosting can be placed in an airtight container and refrigerated for 1 week for frozen for 3 months. Bring to room temp and rewhip before using.
- The ganache can be made the day before and left at room temperature overnight or refrigerated for up to a week. You’ll need to bring it to room temperature again before use.
- The finished cake (whole or sliced, stored airtight) can be frozen for up to 3 months.
Can I get the measurements by weight/grams?
- There is a Metric option in the recipe card. If you click it it will convert everything to grams.
- This conversion is done automatically and I cannot guarantee the accuracy but many readers have had success using the metric option for this recipe.
Comments
Post a Comment